Page 10 of 18

Re: 1972 Nail Project

PostPosted: Tue Oct 29, 2013 8:44 pm
by Lowestofts danny boy
Mine was started as a teenage dream but the car changed due to budget lol as I always wanted a mk3 2 door cortina but fortune smiled on me when I saw haggisthebadgers viva on ebay instant love at first sight. I'm planning a full strip every part off sort the shell out all rot removed and fully welded up, followed by a full galv and respray in sky blue (ral 5015 sky blue) two pack paint. then the rebuild of the engine full flow and tune with a ground up rebuild. Cream leather door cards and roof lining ow and seats and sea grass carpet. only gonna take me 6 years but it's gotta be done :D :D :D :D :D

Re: 1972 Nail Project

PostPosted: Tue Dec 31, 2013 7:02 pm
by 1972nail
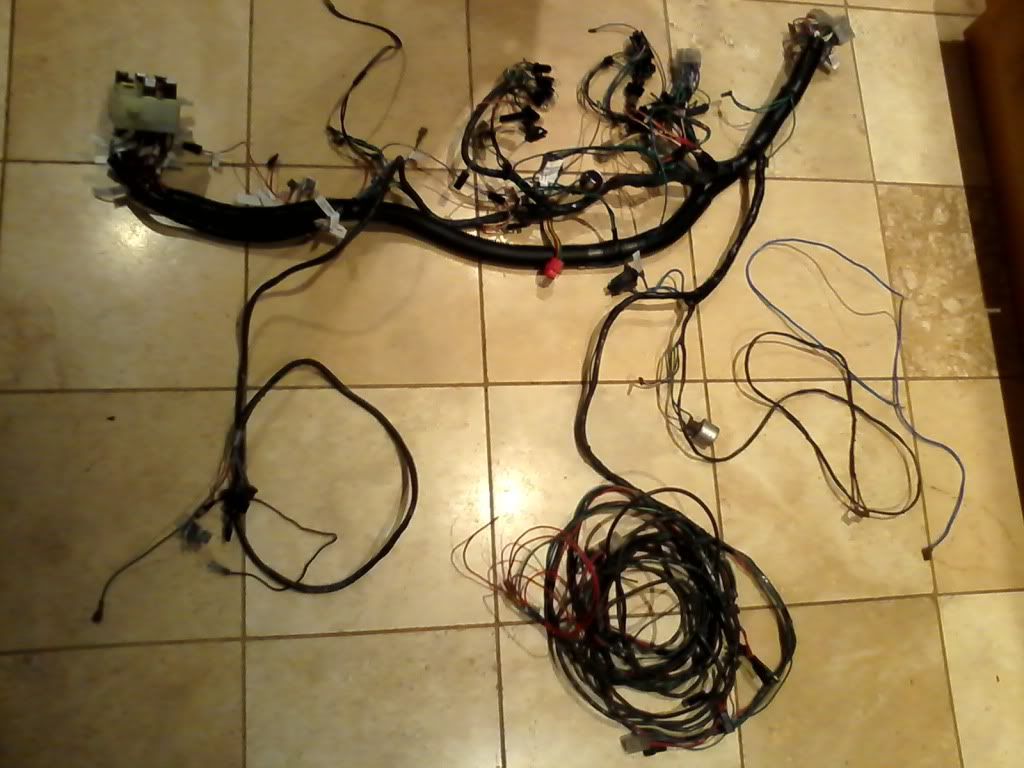
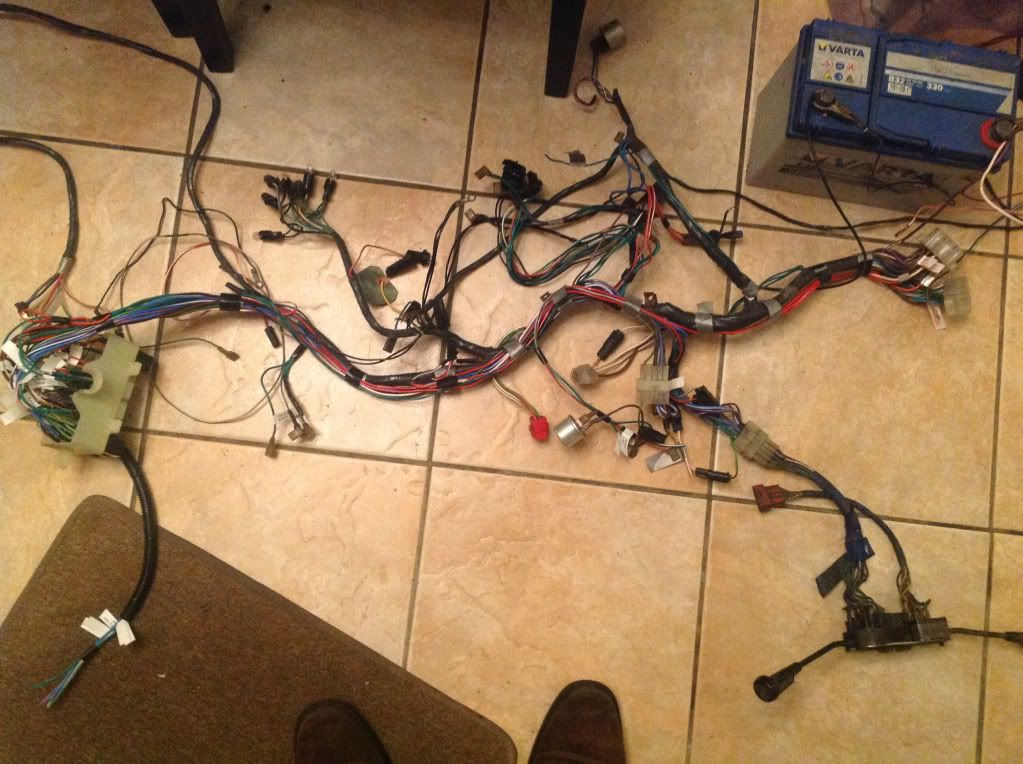
It's been a while since my last update. I've spent the past few weeks planning modifications to the wiring loom to add relays, more fuses and a few extra circuits. Here's the execution of these plans -

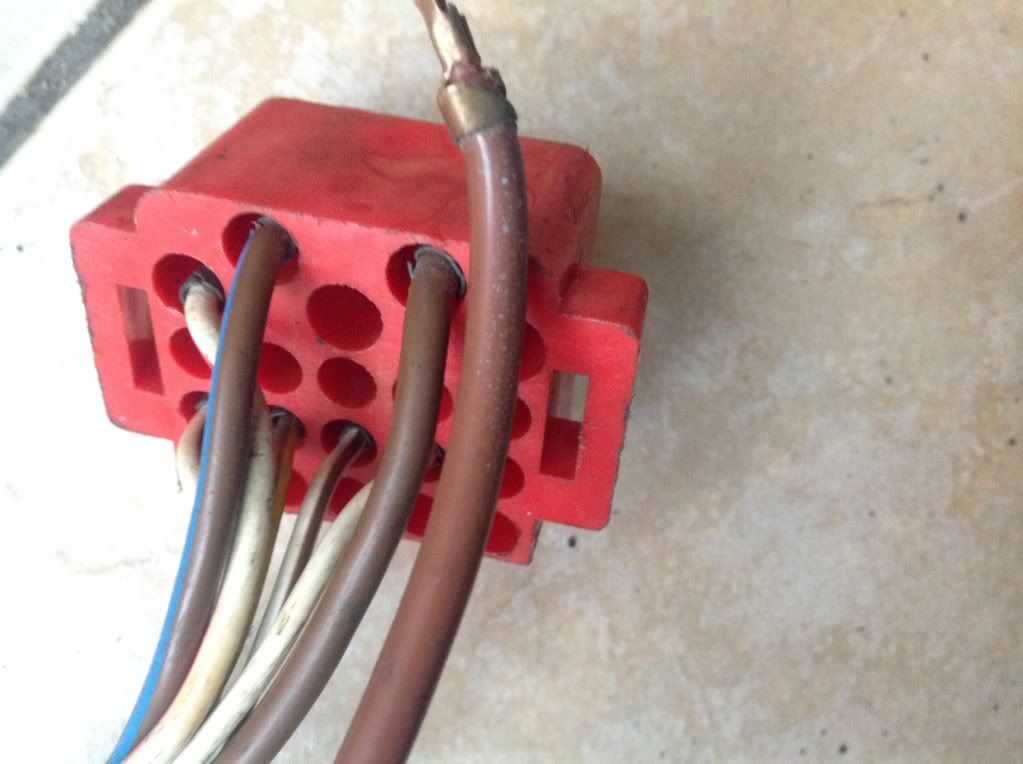
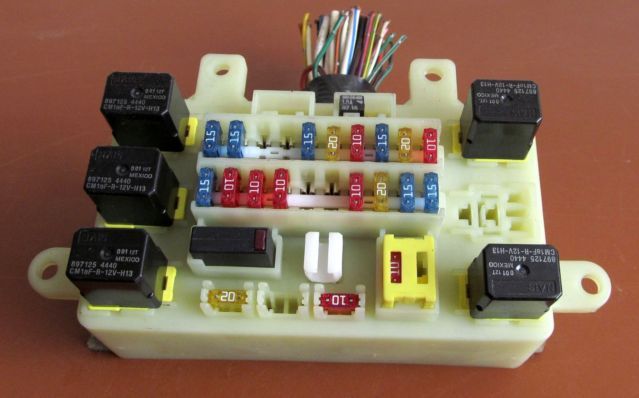
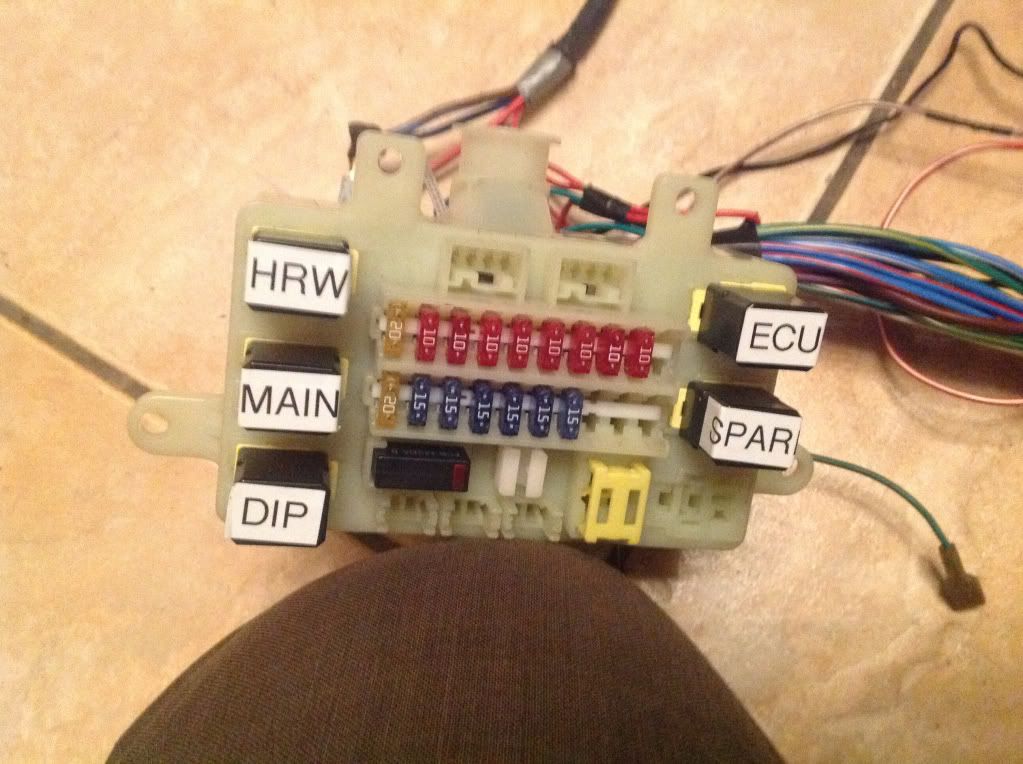
Buy one Frontera interior fuse and relay box for £7 inc p&p on eBay and strip it down.

Image

Add a bunch of wires with labels

Image

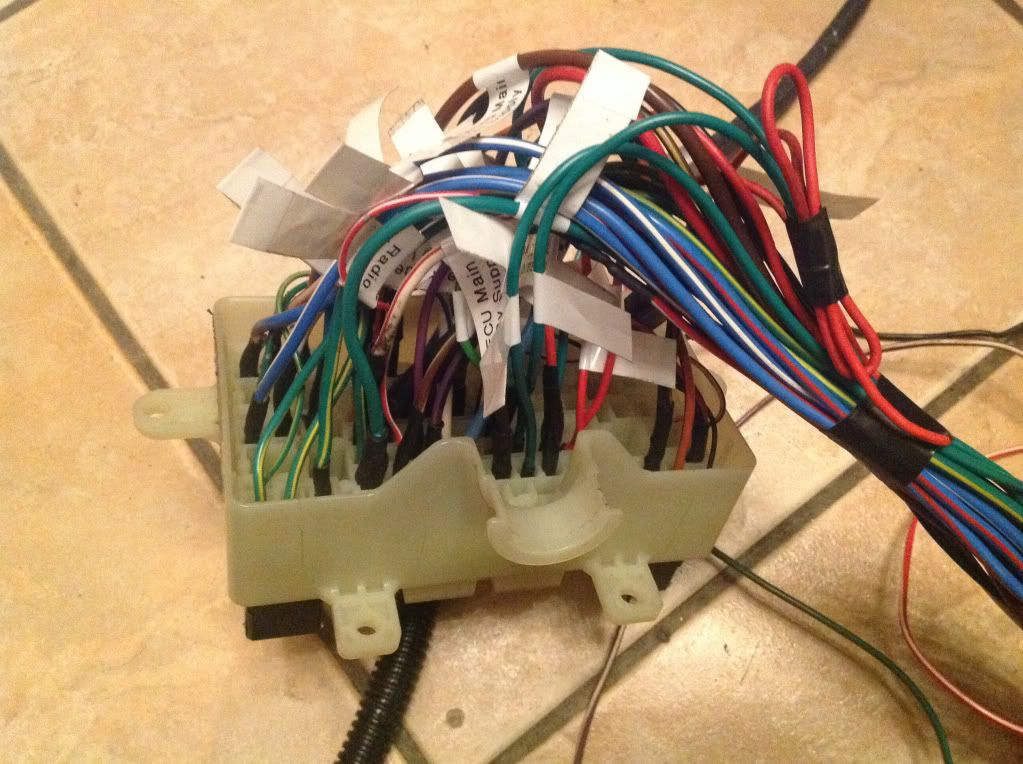
Join the wires into a Magnum 7 dial loom

Image

Decide what all the new bits will do

Image

Modify the existing bulkhead and switch connections to suit

Image

Image

Connect up a battery and test light and all is working OK.......

I've added relays for the HRW, dip and main beams. I've added a modern 30A circuit breaker for the headlight main feed.
Additional 'sub' fuses for HRW, main and dip beams, indicators, hazard warning lamps, radio, heater motor and a spare live feed for good measure.

I've also done a bit of forward planning and added a main relay controlling a live feed for an EFI and engine management system. This live feed supplies fused circuits for the ECU, low and high pressure fuel pumps, injectors and sensors and these circuits left as tails where the ECU may be fitted.

The new extension loom will be tidied up and wrapped in conduit. The fuse box will be mounted on a hinged panel below the passenger side lower storage shelf. The ECU will be placed on the same panel .... eventually.

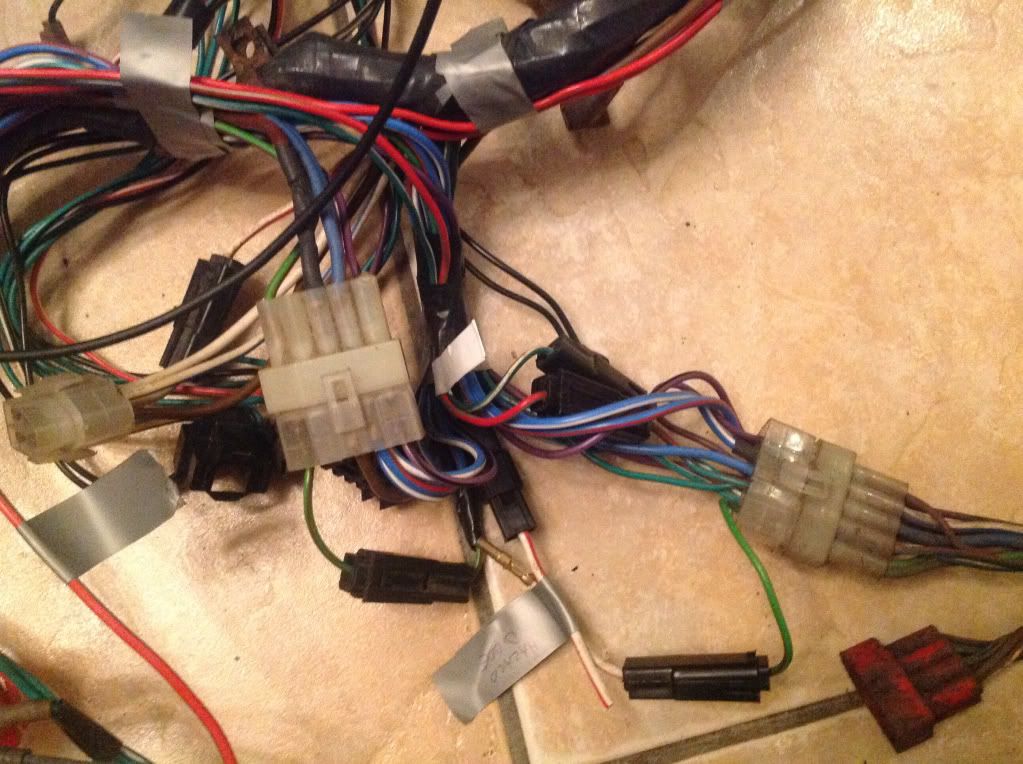
I stripped couple of old scrap HC looms for suitable wires and connectors. The fuses fitted in the pictures are only there for circuit testing and will be replaced with ones suited to the circuit loading when I get down to the motor factors to buy them.

Total cost.... less than £15.

Re: 1972 Nail Project

PostPosted: Wed Jan 01, 2014 1:52 pm
by 1972nail
It's all right adding in all these extras into the internal loom but what about the main supply from the battery?

The twin headlight loom has 2 main feeds from the main battery supply. One for the headlights and the other for the rest. My mods have reduced the load on the headlight supply and increased the load on the other main supply.

The single headlight 1256 loom has only one main feed for everything, but this is substantially larger than either of the two twin headlight loom feeds.

Image

The cable is the same length and has the same terminals so a simple swap over and an instant uprated supply :D

This still leaves the question ~ what about the fusible link rating? Hmmmmm....... still have to work that out. Any ideas?

Re: 1972 Nail Project

PostPosted: Wed Jan 01, 2014 3:41 pm
by jpsmit
This is really outstanding! thanks for sharing - and for getting the creative juices flowing

Re: 1972 Nail Project

PostPosted: Sun Jan 12, 2014 4:40 pm
by 1972nail
Spent yesterday finishing off the wiring. All nicely bound and fitted in conduit for neatness and protection.

Image

Just the electric fan, electric fuel pump and boot light connections to be cut to length and finished on the car.

Hope it all works!

Fusible links? I think I'll use a 1256 link to match the new uprated main supply cable and a 2300 headlight supply link to supply the remains of headlight circuit.

Still never found out what they are rated at!

Re: 1972 Nail Project

PostPosted: Mon Jan 27, 2014 11:01 pm
by dazza
Hi, love the upgraded wiring loom. What kind of tape did you use to re-tape it apart from the conduit?
i'm going to make a couple of additions to my hb one while it's out after seeing yours(not quite so involved though)

Ta,
Dazza

Re: 1972 Nail Project

PostPosted: Tue Jan 28, 2014 12:33 am
by 1972nail
I used ordinary black insulating tape. You could use specialist loom tape without adhesive but it is expensive and hard to use.

I suggest you add relays to the headlight circuits as a major priority. The switches and connections are not up to the job really and eventually overheat a bit.

Re: 1972 Nail Project

PostPosted: Tue Jan 28, 2014 7:43 pm
by dazza
"I suggest you add relays to the headlight circuits as a major priority. The switches and connections are not up to the job really and eventually overheat a bit."

Sounds like a good idea, and much easier now than later. Just got to have a good look to see where I can discreetly fit them.

Re: 1972 Nail Project

PostPosted: Sat Feb 15, 2014 6:34 pm
by 1972nail
Did an hour's work today on the car.

Take a couple of cruddy old window trims........

Image

Image

Spend an hour cleaning them up and here's the result......

Image

Image

Well not quite! I used chrome vinyl wrap and I'm very pleased with the result. Must do the rear ones now. :lol:

Re: 1972 Nail Project

PostPosted: Sun Feb 16, 2014 8:11 am
by Paul Dawson
Wow - they're shiny. I've never used wrap. The nearest I got was heat-shrink film on model aircraft, used to get some pretty stunning results with it. Gettting complex curves wrinkle free was always the tricky bit. How stretchy is the vinyl film?