Sportshatch OSA100R

This is an area for discussion about Restoration issues.

Sportshatch OSA100R

Postby 1972nail » Sun Dec 21, 2014 6:00 pm

My brother bought the Sportshatch OSA100R back in September

Image

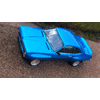
The bodywork and paint had been restored by the previous owner but really the mechanicals had been left untouched. So far we've fitted new rear brakes, new brake lines and hoses, new fuel lines, replaced the steering rack (thanks Fred), fitted new disc backplates, new top and bottom ball joints on passenger side, fixed the tank sender unit, fitted an extra box in the exhaust and fixed the overdrive with a new solenoid. Oh, and we replaced the rotted through driver's side window winder (thanks Fred, again) and fitted a new radiator.

Image

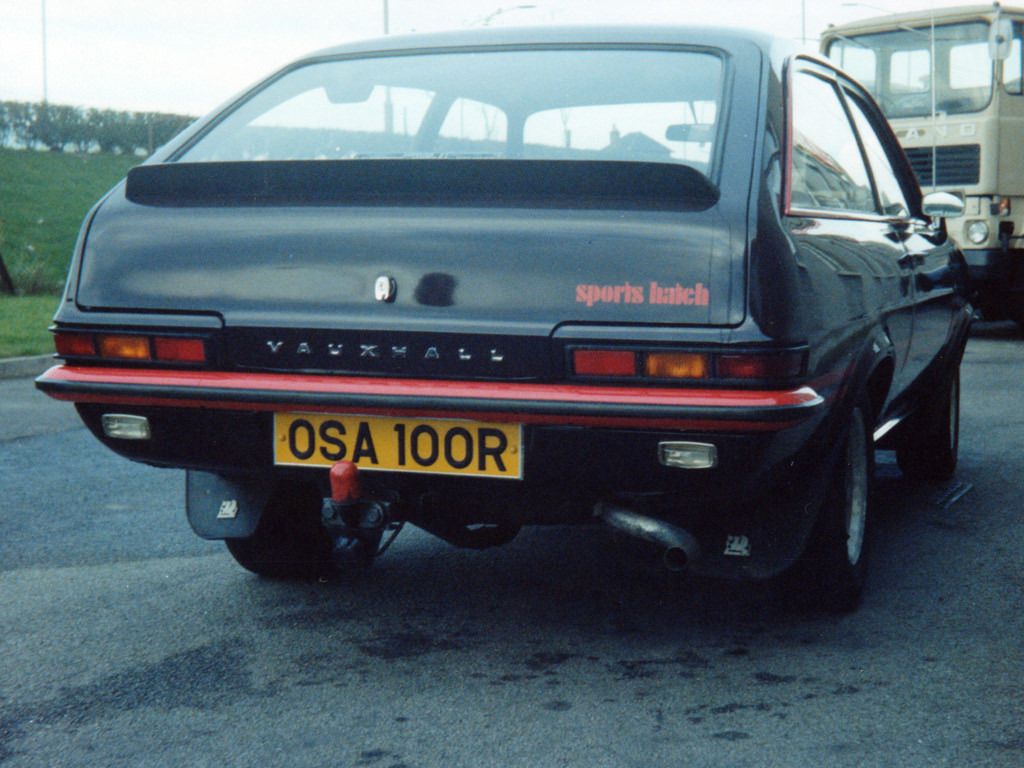
Work still to do - re-furb or replace the dip headlights, completely rewire the headlight circuits (a total mess of additional relays and wiring strung everywhere!), new tyres, make a new rear spoiler and sort out the interior.

Will update as progress is made.
Editor of the VVOC Magazine ReVival

"When you have a Firenza like mine, who needs any Minis?" copyright David Maxwell 1979.
User avatar
1972nail
Old Nail
Old Nail
 
Posts: 3185
Joined: Sun Aug 07, 2011 4:16 pm
Location: Ballymoney Co Antrim - some say....the World's best place to live!

Re: Sportshatch OSA100R

Postby 1972nail » Sun Dec 21, 2014 6:44 pm

Here's the mess of wiring which we found behind the headlights.

Image

3 relays wrapped in insulating tape (one for the horns, two for the headlights) a complete butchery job of the existing loom and a completely new set of wires for the headlights strung across the bulkhead. Not a fuse in sight!

Here's the existing loom ready for repair

Image

Here's the auxiliary loom ready to be stripped of anything useful and them chucked!

Image

Guess what I'll be doing on my Holidays!
Editor of the VVOC Magazine ReVival

"When you have a Firenza like mine, who needs any Minis?" copyright David Maxwell 1979.
User avatar
1972nail
Old Nail
Old Nail
 
Posts: 3185
Joined: Sun Aug 07, 2011 4:16 pm
Location: Ballymoney Co Antrim - some say....the World's best place to live!

Re: Sportshatch OSA100R

Postby dann01 » Mon Dec 22, 2014 11:48 am

Good luck with that. :D

Dan
Sometimes, I wonder why I bother, and then for one fleeting moment things will go right for a change.
User avatar
dann01
Club Treasurer
 
Posts: 2684
Joined: Fri Dec 23, 2005 5:59 am
Location: Somerset

Re: Sportshatch OSA100R

Postby 1972nail » Mon Dec 22, 2014 11:52 am

dann01 wrote:Good luck with that. :D

Dan


Thanks Dan,

Wiring shouldn't be problem. There are a few other bits that need fabricated and repaired which may take a bit more thought and work.
Editor of the VVOC Magazine ReVival

"When you have a Firenza like mine, who needs any Minis?" copyright David Maxwell 1979.
User avatar
1972nail
Old Nail
Old Nail
 
Posts: 3185
Joined: Sun Aug 07, 2011 4:16 pm
Location: Ballymoney Co Antrim - some say....the World's best place to live!

Re: Sportshatch OSA100R

Postby 1972nail » Mon Dec 22, 2014 9:11 pm

Image

Here's a photo of the car taken by the first owner when it was about a month old.
Editor of the VVOC Magazine ReVival

"When you have a Firenza like mine, who needs any Minis?" copyright David Maxwell 1979.
User avatar
1972nail
Old Nail
Old Nail
 
Posts: 3185
Joined: Sun Aug 07, 2011 4:16 pm
Location: Ballymoney Co Antrim - some say....the World's best place to live!

Re: Sportshatch OSA100R

Postby 1972nail » Fri Dec 26, 2014 8:34 pm

Spent this afternoon tidying up the Sportshatch lighting wiring loom. Fitted new waterproof connectors to the headlights and fixed lots of butchered wiring. Just need to acid dip the old fuse box connectors to clean them up.

Image

Additonal relays and fuses will be hidden inside below the dash - a job for another day!
Editor of the VVOC Magazine ReVival

"When you have a Firenza like mine, who needs any Minis?" copyright David Maxwell 1979.
User avatar
1972nail
Old Nail
Old Nail
 
Posts: 3185
Joined: Sun Aug 07, 2011 4:16 pm
Location: Ballymoney Co Antrim - some say....the World's best place to live!

Re: Sportshatch OSA100R

Postby 1972nail » Sat Dec 27, 2014 8:08 pm

This afternoon's job.

Auxiliary fuse and relay panel along with acid dipped main fuse box ready to fit.

Image

Auxiliary panel fitted above the passenger side foot well on a hinged bracket.

Image

All the wiring completed and labeled.

Image
Editor of the VVOC Magazine ReVival

"When you have a Firenza like mine, who needs any Minis?" copyright David Maxwell 1979.
User avatar
1972nail
Old Nail
Old Nail
 
Posts: 3185
Joined: Sun Aug 07, 2011 4:16 pm
Location: Ballymoney Co Antrim - some say....the World's best place to live!

Re: Sportshatch OSA100R

Postby hbpeter » Sun Dec 28, 2014 12:54 pm

How do you make it look so easy!! :new2_shrug: :help3:

Peter
Reading between the lines, dangerous if your waiting for a train.
User avatar
hbpeter
Register Rep
 
Posts: 10916
Joined: Sat Oct 29, 2005 12:11 pm
Location: Thornaby, Cleveland

Re: Sportshatch OSA100R

Postby 1972nail » Sun Dec 28, 2014 3:23 pm

It's not that hard Peter, just take time and think it through.

On OSA there will be relays for the main beam, dip beam, HRW and one spare possibly for a future electric fuel pump.

I took the main feed for the headlights to the aux fuse box from the back of one of the spare big terminals (B3) on the main fuse box and then fused the feed to each headlight relay in turn.

I'll also replace the thermal cutout for the lighting circuit with a 10A fuse as this now only carries the current for the sidelights, rear fogs and the switching current for the headlight relays, probably a total of about 6 or 7A. The cut out is rated at about 28A with the quad head lights taking about 20A. These now are fed from the relay circuits so the load on the cutout is reduced by that amount.

I chose B3 as the supply as this fed from the same part of the charging circuit as the headlights are already, I therefore am not imbalancing the loads on the existing fusible links.
Editor of the VVOC Magazine ReVival

"When you have a Firenza like mine, who needs any Minis?" copyright David Maxwell 1979.
User avatar
1972nail
Old Nail
Old Nail
 
Posts: 3185
Joined: Sun Aug 07, 2011 4:16 pm
Location: Ballymoney Co Antrim - some say....the World's best place to live!

Re: Sportshatch OSA100R

Postby 1972nail » Sun Feb 15, 2015 12:17 am

Time to update.

The wiring is complete and working a treat. I also had to strip out the engine loom and remake quite a bit of that as well. The engine had been out for the bodywork rebuild and many of the wires had been cut or hacked about and then threaded back in through other wrong places - generally a mess that was waiting to break down or go on fire!

The manual choke conversion levers had been damaged, bent and the choke cable kinked and frayed. The carb adjuster had seized. So running poorly was an understatement.

Today was spent stripping out the carb and fixing all the faults - isn't that 4th bolt, the one on the bottom of the carb above the starter, a real pain about 2 feet below the neck to get refitted! That's probably why there were only 3 nuts on the carb before I removed it....hmmmmm. Running a lot better now.

The wheels have been powder coated and new Kleber 185/70's ordered.
Editor of the VVOC Magazine ReVival

"When you have a Firenza like mine, who needs any Minis?" copyright David Maxwell 1979.
User avatar
1972nail
Old Nail
Old Nail
 
Posts: 3185
Joined: Sun Aug 07, 2011 4:16 pm
Location: Ballymoney Co Antrim - some say....the World's best place to live!

Next

Return to Restoration

Who is online

Users browsing this forum: No registered users and 18 guests