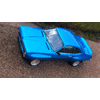
Rewinding back a couple of weeks, because this project has become glacial in its progress. First thing.. those wheels. I fitted them and rolled the car out the back while I used the hoist for a customers car. It looks great on the Turbos. They certainly do suit this car better than on Viva one. I had also noted that the Viva wagon is exactly the same colour as the water tank...

I had been umming and erring about removing the battery tray from the engine bay. I knew if I did that I would have to fabricate a box down the back under the floor due to the wagon needing to be clear floored for max usefulness in earning its keep. I also knew the tray was hiding things. Bad things possibly.
I removed it. Not easily either. It seem that the fella who spot welded it in place was either drunk, had too much coffee or was suffering from MS. There was no order to the spots and I couldn’t find them. I couldn’t just chisel it off because doing so would dent and wreak the inner wing. Took ages.

Off with it and look at that. Yuck. Glad it was gone because no way would that stuff had rested from its metal eating duty. With it gone I looked over the general mankyness of the whole bay and realised it needed to be done properly. I removed the heart. It was only being held in place by two exhaust nuts and the two mounts. So tiny. With it out I whipped up a simple engine cradle/wheelie tray thingee to put it on so it can be moved about the workshop easily.

Hannah is going to get paid in kind words, cups of tea and biscuits to clean the engine for me. I noticed that the frost plug on the back of the head looks very dodgy indeed so lucky it was out anyway. It could have spoiled the party later on…

I filled up holes, cut our more rusty patches and generally cleared it all out for a nice clean bay look. I cut off all brackets to do with the ugly factory throttle linkage. I have instead been given a later Viva HC throttle pedal like I have fitted to Viva one. Big thanks to Andre yet again for having one in his stash of bits. Hannah laughs at my idea that if I have the same pedals then when jumping from car to car for daily driving they will feel the same to drive. I don’t think she realises the power of the mighty 1159cc Viva.
I also dealt to the rust that was in the drivers side A pillar…

Welded up the cut in the hinge bracket that had refused to let go of the pin ages ago at the very beginning.

After welding up all the holes in the bulkhead leaving only the clutch cable and speedo cable holes I ground them all smooth.

I then removed the now very scratched and sad looking screen. I think it might be the original. With it gone I was pleasantly surprised at the lack of rot in the well. Only one corner had succumbed and it was not bad at all. I cut it out, welded it up and moved around to the back where it was rotten in the pillar.


With the screen out one can easily marvel at the beauty of such a mint dash top..

Now fixed and strong again I stepped back into the engine bay and continued grinding, sanding and smoothing the bay. To earn this episodes title of ‘getting carried away’ I even removed the fuse box and welded up the hole. I might have to do this mod to Viva one some day.


Finally I applied some Brunox epoxy rust neutraliser. This is now where I am at with the bay…

I had popped into Nelson last week for welding gas etc so while there I went to an automotive paint shop and bought some epoxy primer plus three cans of colour matched spray paint. Well they were colour matched at the time. I had forgotten to take in my little bit of steel which had un-faded paint on it. So instead me and the fella behind the till tried to match the colour off a internet photo of a Cactus green Viva off the nerdnet on my phone. Never easy. Once home I sprayed some on the car. Whoops. It’s a bit brighter. But its still nice and looks 60s so it’ll do. Anyway- any engine bay painted in one neat clean colour always looks better.
So that is where I am at now. I have heaps of paid work on right now so Hannah having finished her current work in one days time will get some cleaning and painting jobs. This way she shall earn the privilege to hold up traffic in the mighty Viva wagon (hatch..) on the hills around us. I have been having many thoughts about engine swaps or sneaky turbos and simple injection systems don’t you worry. But really I have strayed far enough already. I will however be re-wiring the bay so to allow for really easy engine swap/changes in management etc for the future. Keeping all the lights/horn/starter/alternator etc separate to the engine loom.
Ha..the current engine loom. All of 3 wires? Temp, oil, ignition feed. Old cars eh? Giggle