HB + Mazda 24v V6. Now sold and gone to a good home :-)

This is an area for discussion about modifications to Vivas.

Re: hB with Mazda rotary turbo. 24V V6 next.....

Postby yoeddynz » Mon Nov 12, 2012 7:45 pm

Today this arrived from Auckland.

Image

I picked it up at lunchtime then took the rest of the day off work and unpacked it all, sorting it into piles of bits to leave at work and bits to take home (homework..). This was very very fun. I cant get over how much stuff there is...

Image


Rebuilt short block - painted in hypercoat or something. Includes very lightweight flywheel...

Image

Rebuilt heads, all very clean and shiny. Some porting work as been done, i think nothing more than a clean up of rough edges.

Image

New clutch, toyota w55 belhousing and an original fwd bell housing that the seller was going to merge.

Image

lots of dizzys and one new cap..

Image

new seals, gaskets, bearings, new cambelt, fanbelt, water pump. not one but two KLZE ecus!!! sweet as because i need one of them.

Last lovely item was this...

Image

Image

Image

Sadly when I got home I discovered that the inlet manifold is designed to be backwards facing.

Image

Image

My Viva has not got enough room for it in that position- too close to bulkhead. So it'll go on the market or something. I'll be back to making my own. Shame as its nicely made. It would need to be lifted very high to clear the cam cover if spun round.

But I cheer up when I see these sitting on the bench..

Image

So I now have at least two complete Kl (2.5 L) engines, one rebuilt. Plus many spares. I'm very happy indeed.

Entertaining a friend over from England so cant do much except look at parts sitting there this weekend. Oh well. Next week...
yoeddynz
Brabham Viva
Brabham Viva
 
Posts: 707
Joined: Fri Oct 12, 2007 2:47 pm
Location: South Island, New Zealand

Re: hB with Mazda rotary turbo. 24V V6 next.....

Postby yoeddynz » Thu Dec 27, 2012 9:34 am

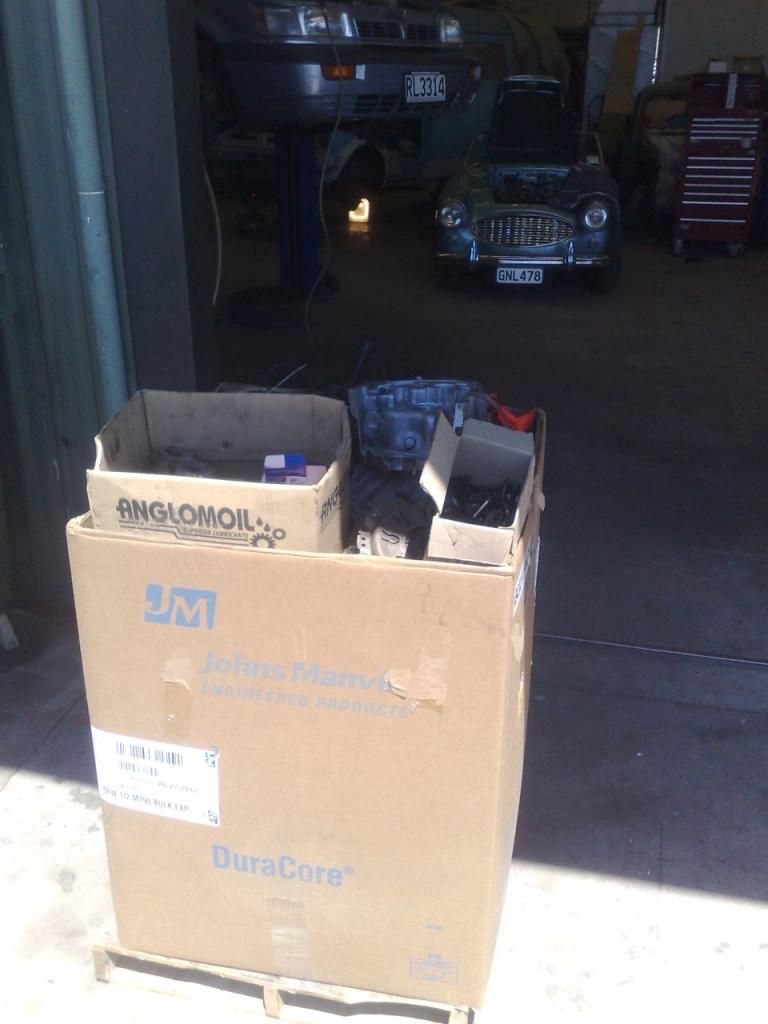
Update time- pulled off RRides so some dates might be odd...


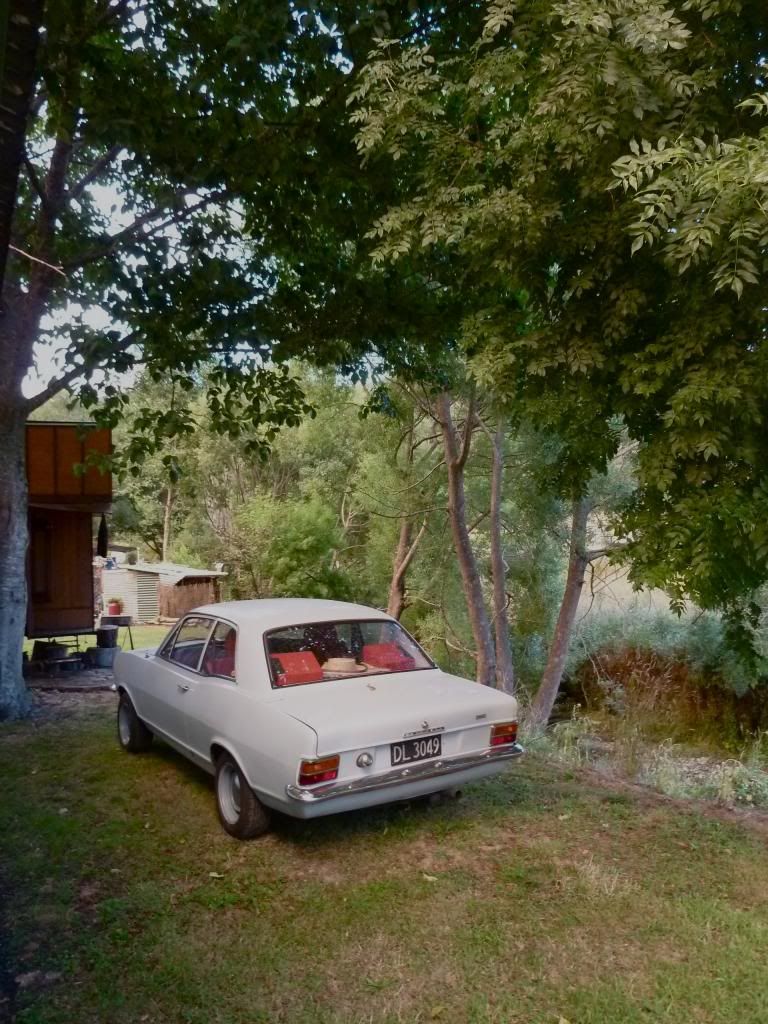
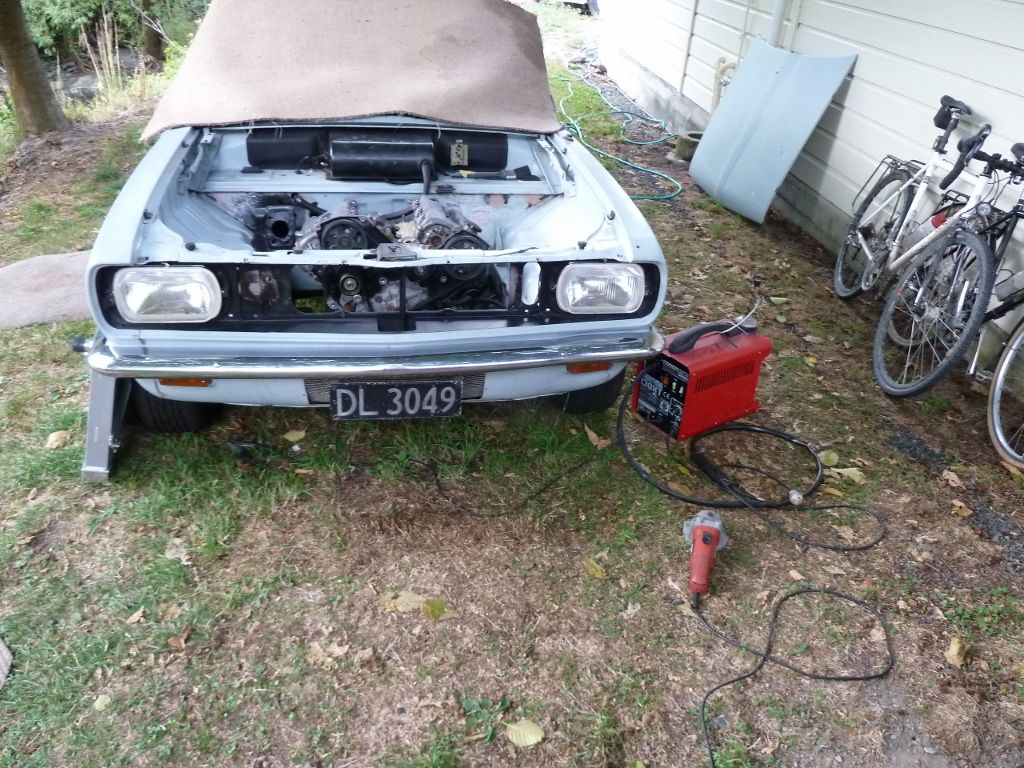
On Friday we had some proper decent race car scales at work to weigh the front of the Bedford CF I'm working on so I can get the right springs ordered. I took the opportunity to weigh the Viva...

Image

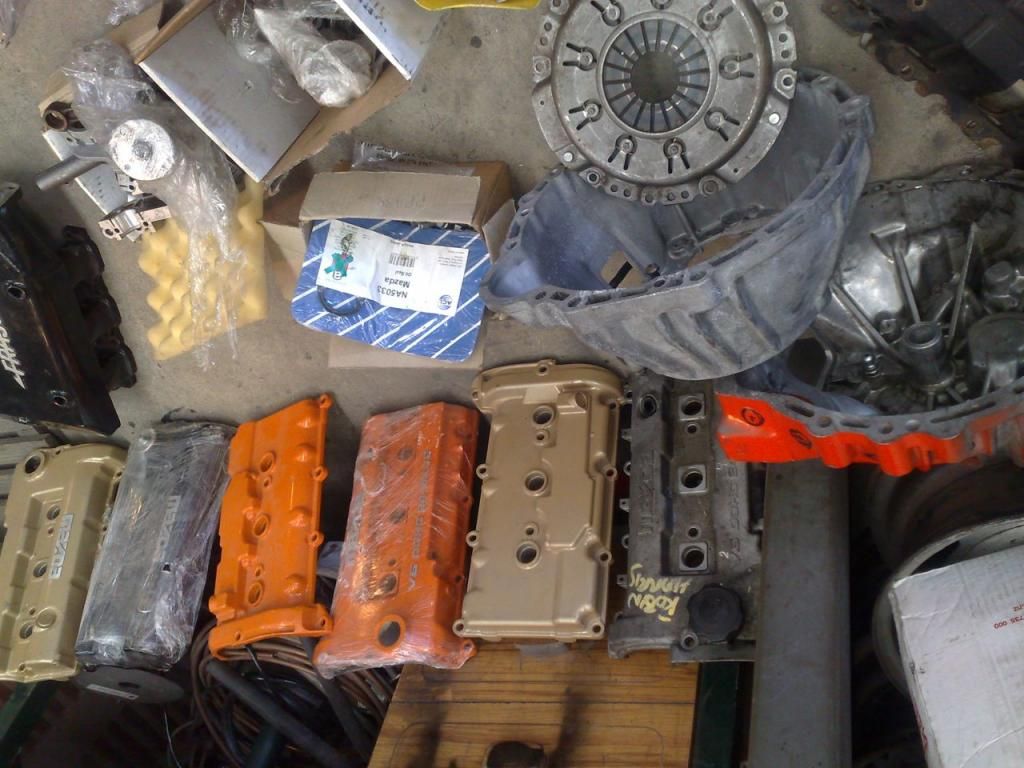
Now a bog standard poverty spec Viva HB 2 door weighs about 770kg. I have added a heavier rear axle from an HC magnum, heavier larger front discs and calipers, heavier engine and box, heavier seats, heavier widened steels. I have always wondered what the car weighs and I have always guessed it might weigh in at about 850-900 kg. but no- it weighed quite a bit more...

Image

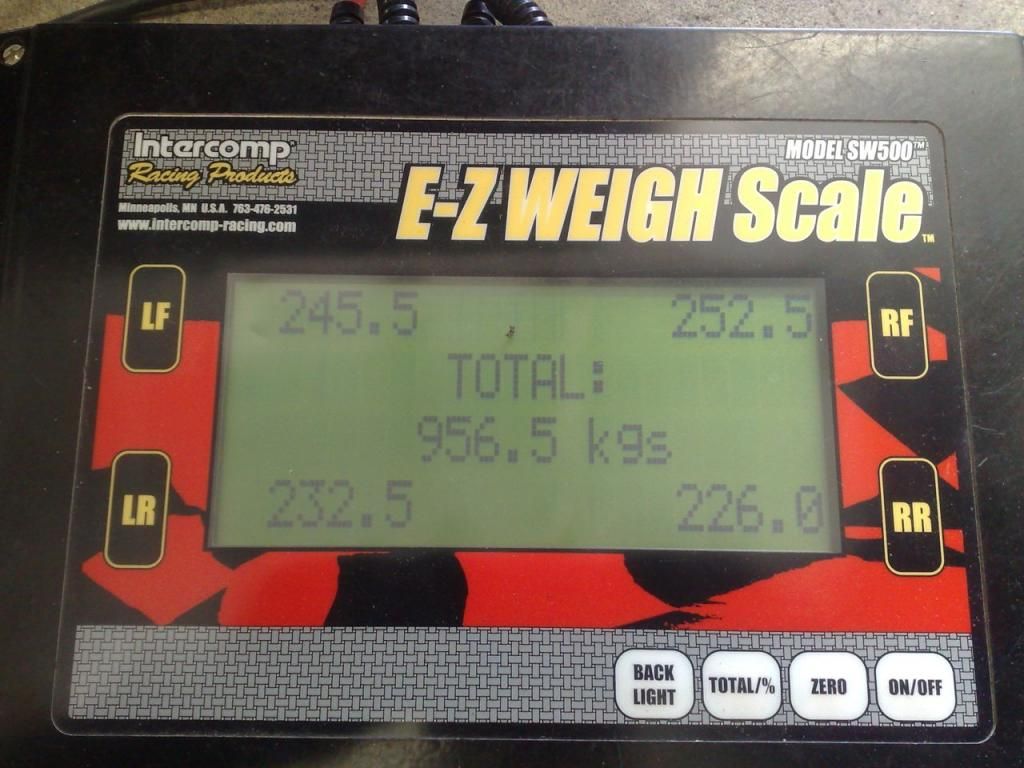
Oh and btw- it came up at almost perfect 50/50 weight distribution. Well without me in it that is..

This weekend should be the last weekend that the Viva will be propelled forwards by two softened triangles spinning away merrily. I will miss it but I'm positive the V6 will be even better (certainly sound better) and I have very itchy engine swappy fingers.

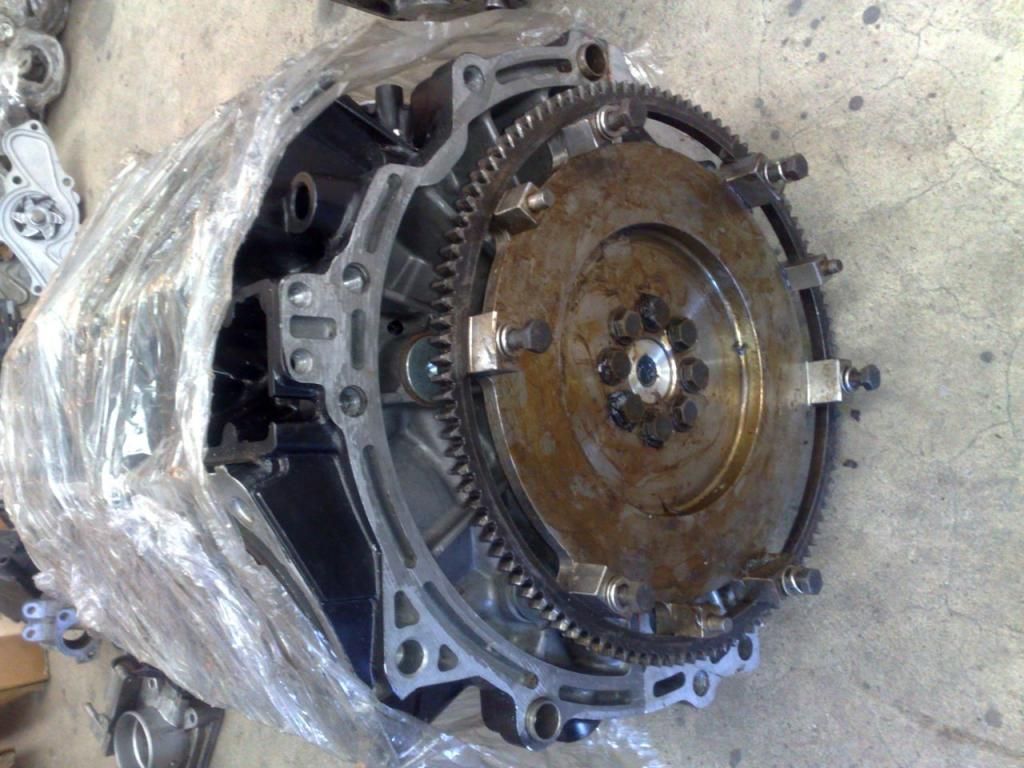
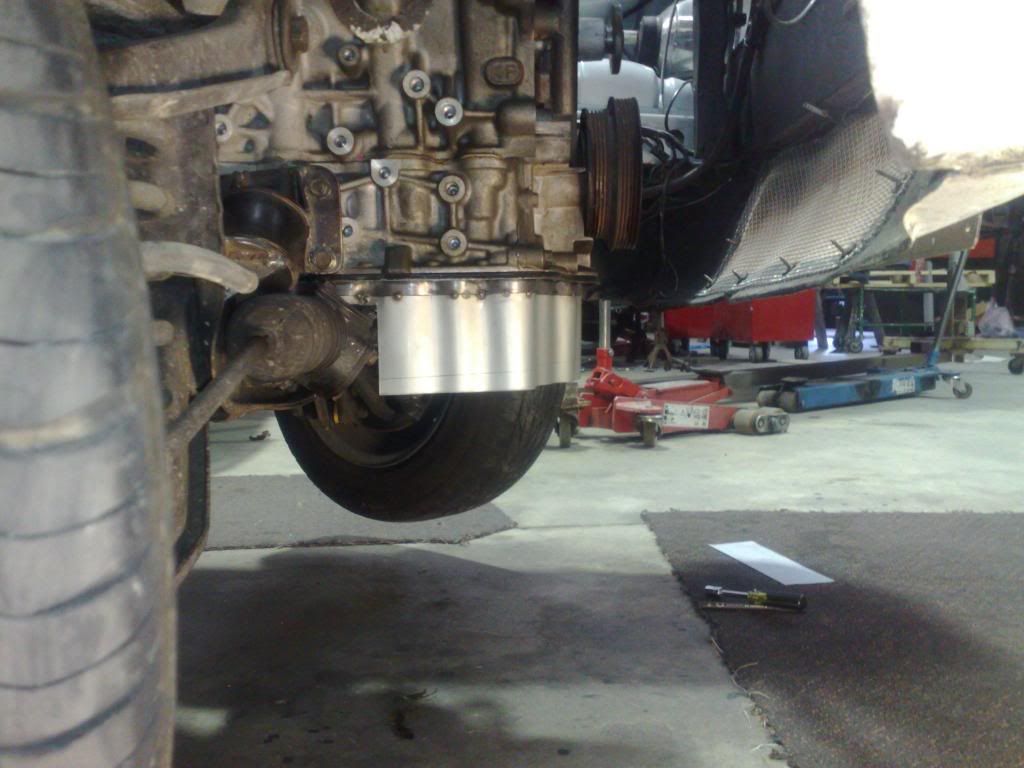
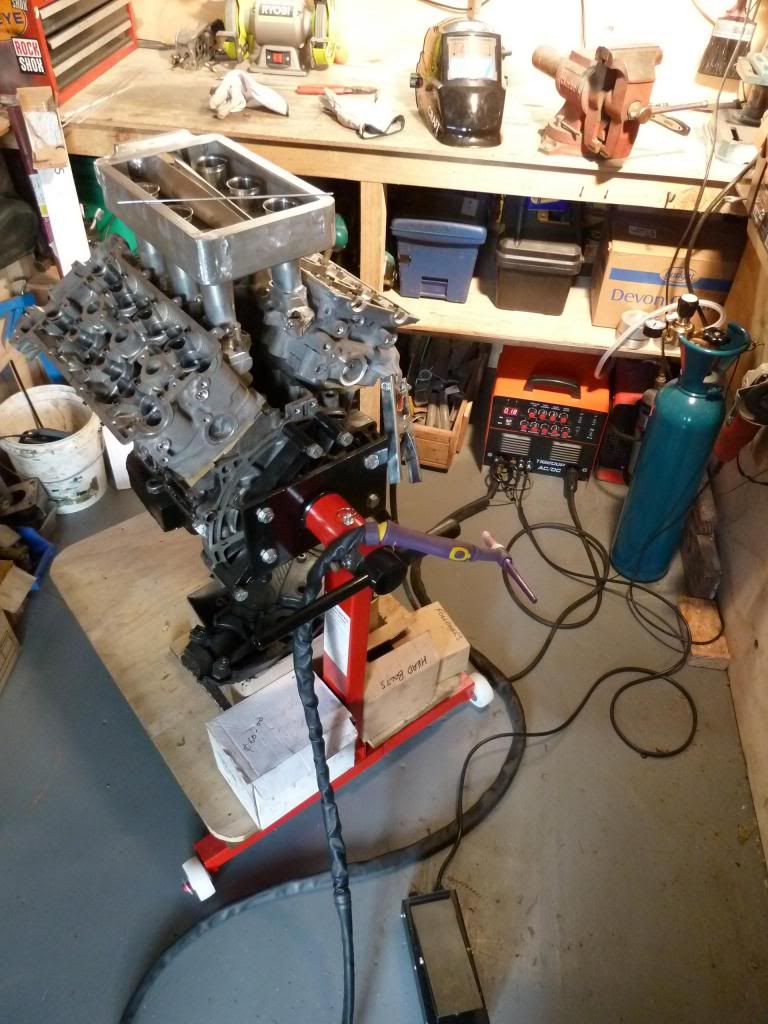
Last night I finished off the spacer that moves the flywheel back 13.5mm. Its a good fit and with that done the conversion of the V6 into RWD configuration is all finished. I now just need to sling it in place and build some engine mounts.

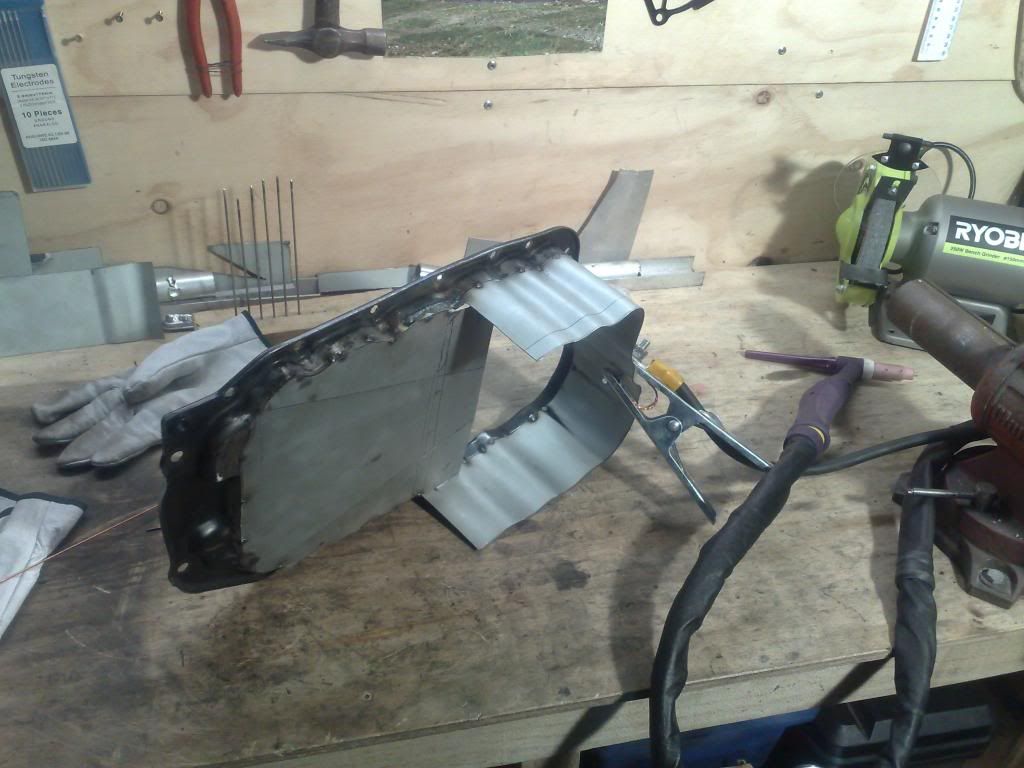
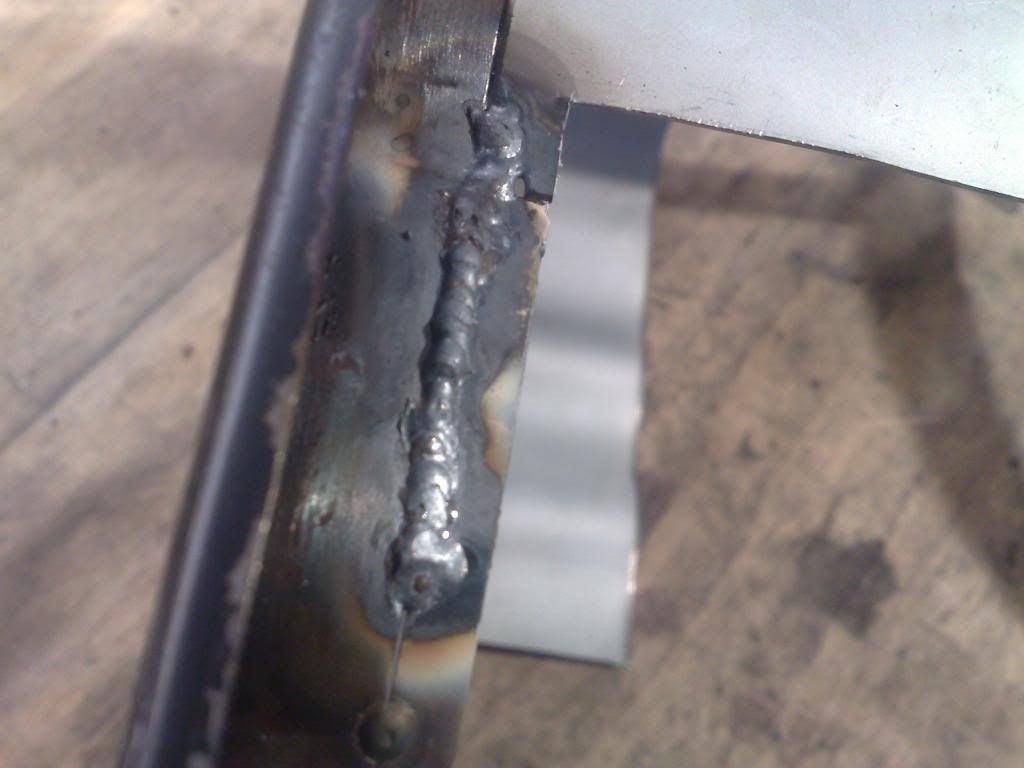
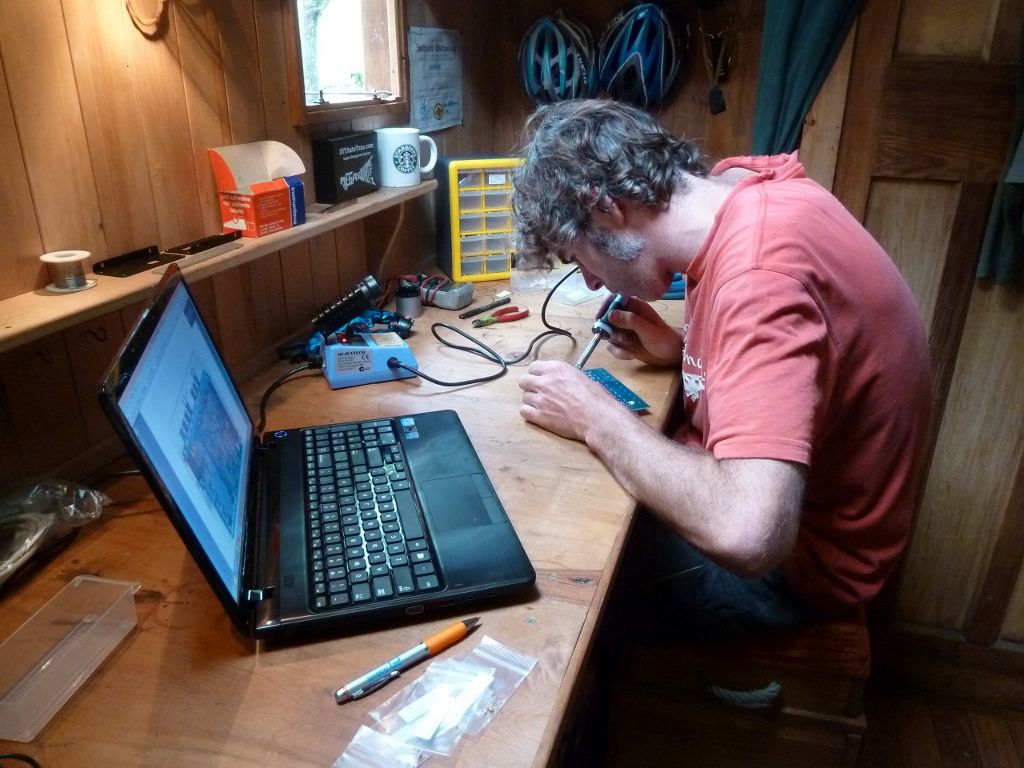
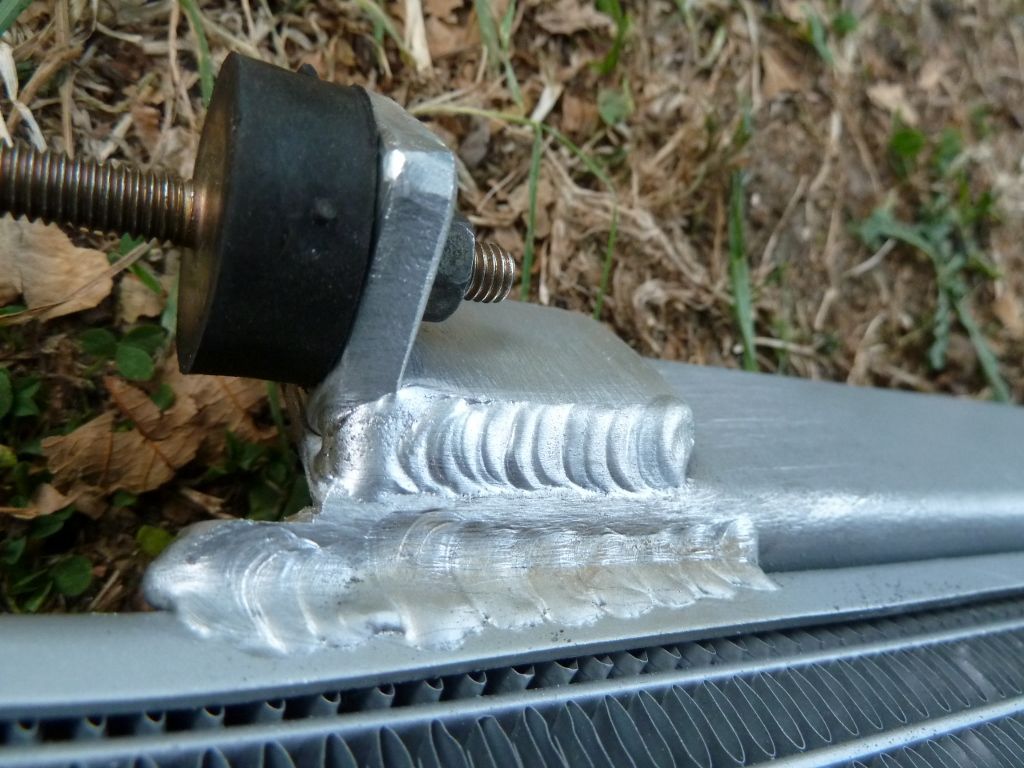
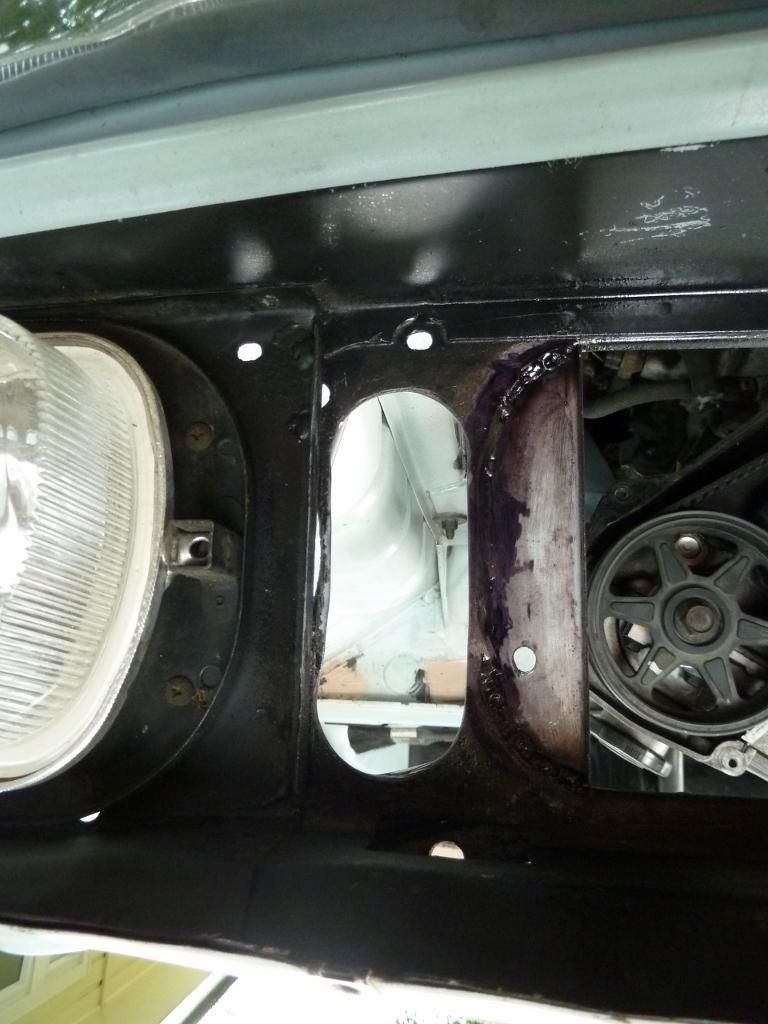
I have been playing with our new ac/dc tig welder. Its top fun! lots to learn but boy its gonna be handy! My first alloy welds, just practicing running beads. My control still isn't there to blend two thin bits together yet but with practice. The messy welds were when a gas hose brass fitting worked loose by the welder. I was wondering what was happening all of a sudden and the heard the argon escaping. ha.

Image

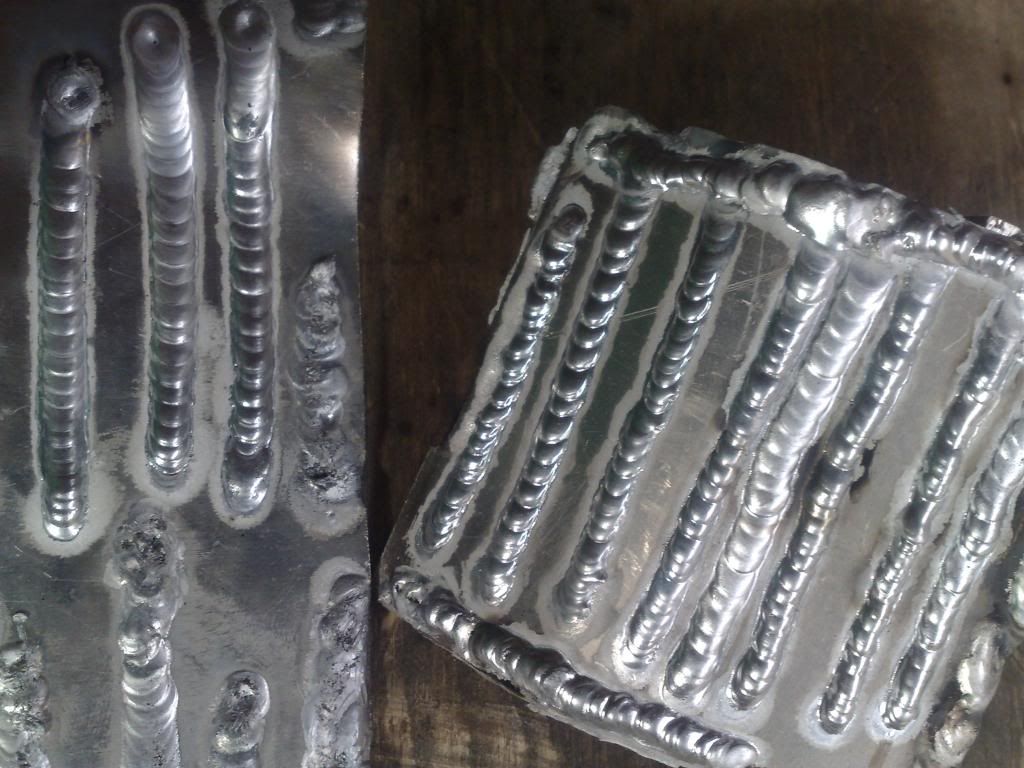
I then thought why not see how the welder handles 10mm thick alloy. I veed the gap out first and then set too. things got pretty hot by the end of it, including me on what was already a hot summer night in the shed. BUt the welder was fine and it almost looks neat. It wont actually be seen anyway but at least now the plate doesn't have a big gap.

Image

Image

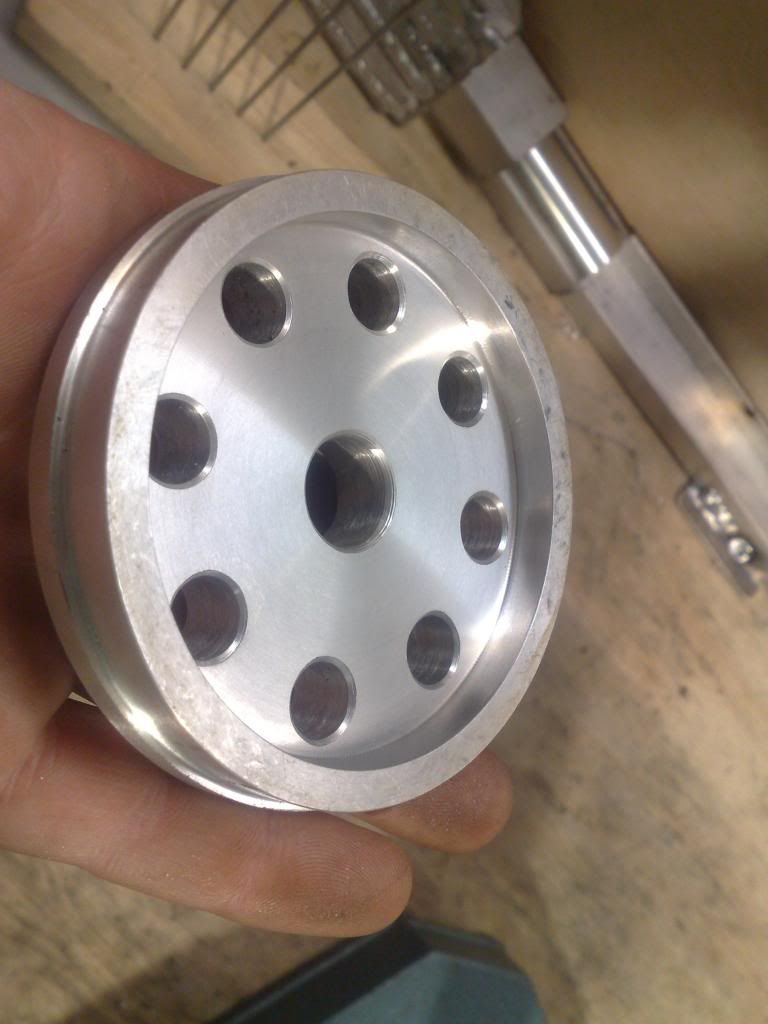
I bought a $35 chunk of alloy to make my spacer and then found a chunk big enough behind my tool box. Typical. I had to work carefully with the old lathe as its quite worn out and I don't want any throwout at all with the flywheel.

Image

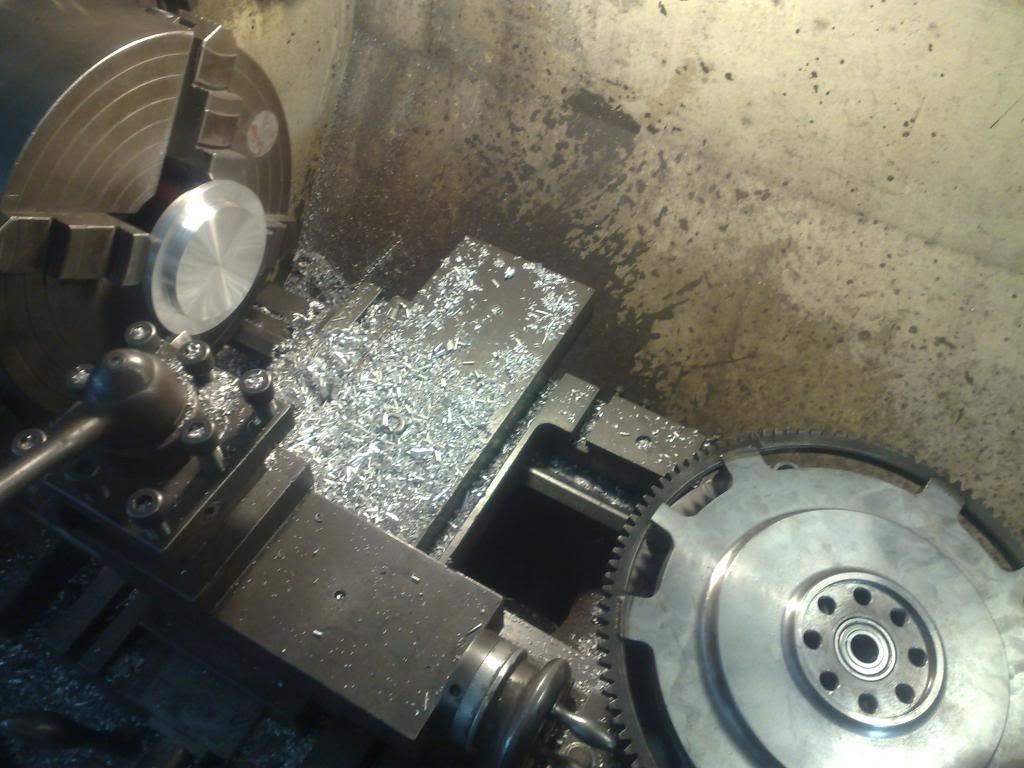
the spacer all finished.

Image

When I have finished lunch its off to work for the afternoon to finish getting the last things ready before I pull the Rotary out. I have many many things to make and do once the V6 is sitting in place but it will still be a cool place to be just having it mounted there.

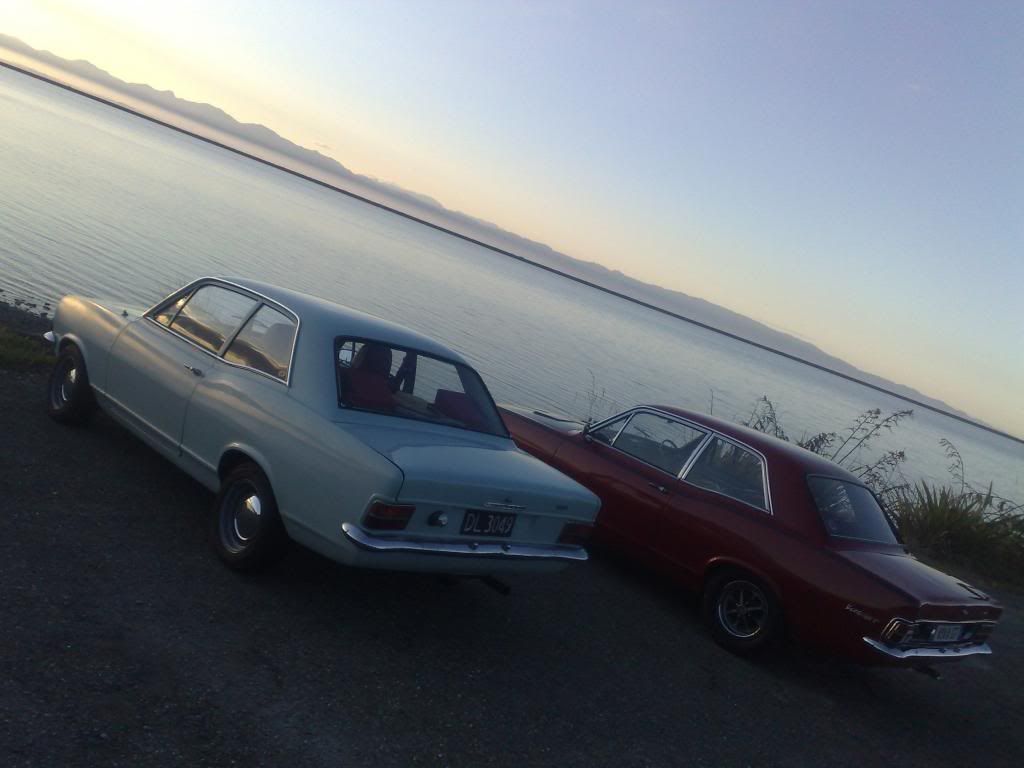
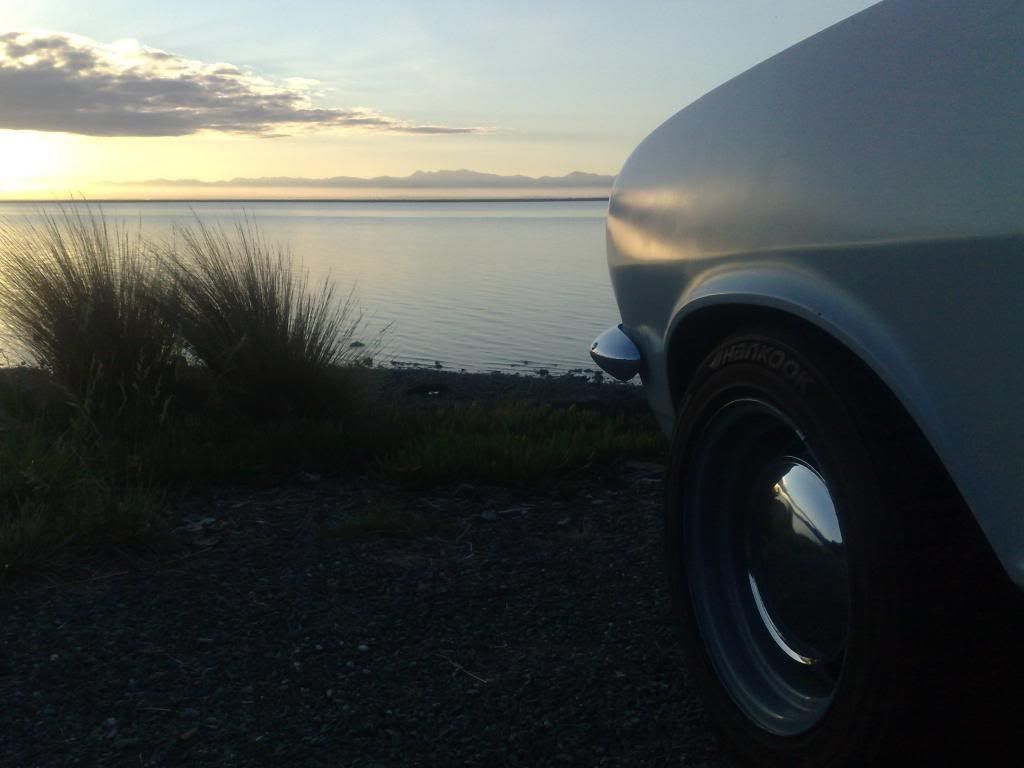
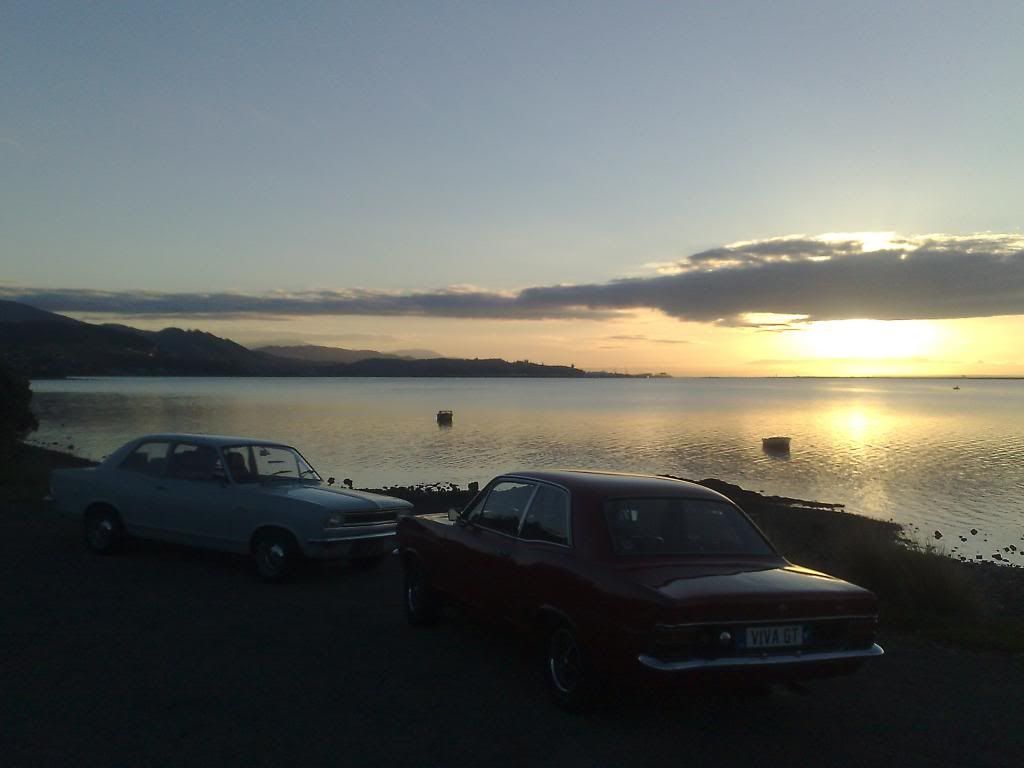
So took the Viva out for last (rotary powered) spin yesterday evening. Met up with Andre who brought out his genuine GT. Had a couple of little races here and there just to confirm to Andre that my little rice powered engine still beats his boat anchor 2.3 slant 4 with big ol' webbers..... :-)

Got some pretty photos.

Image

Image

Image


I'll miss this little engine- it has done 8652 kms completely fault free and never failed to start since last october. Nothing amazing for a modern engine but for a cobbled together old 12A being fed by a carbie turbo its not bad. Still uses curse word all oil. I think its next home may well be Shane's little Ford Anglia- he's the painter at work. Will go bloody well in that!

Image

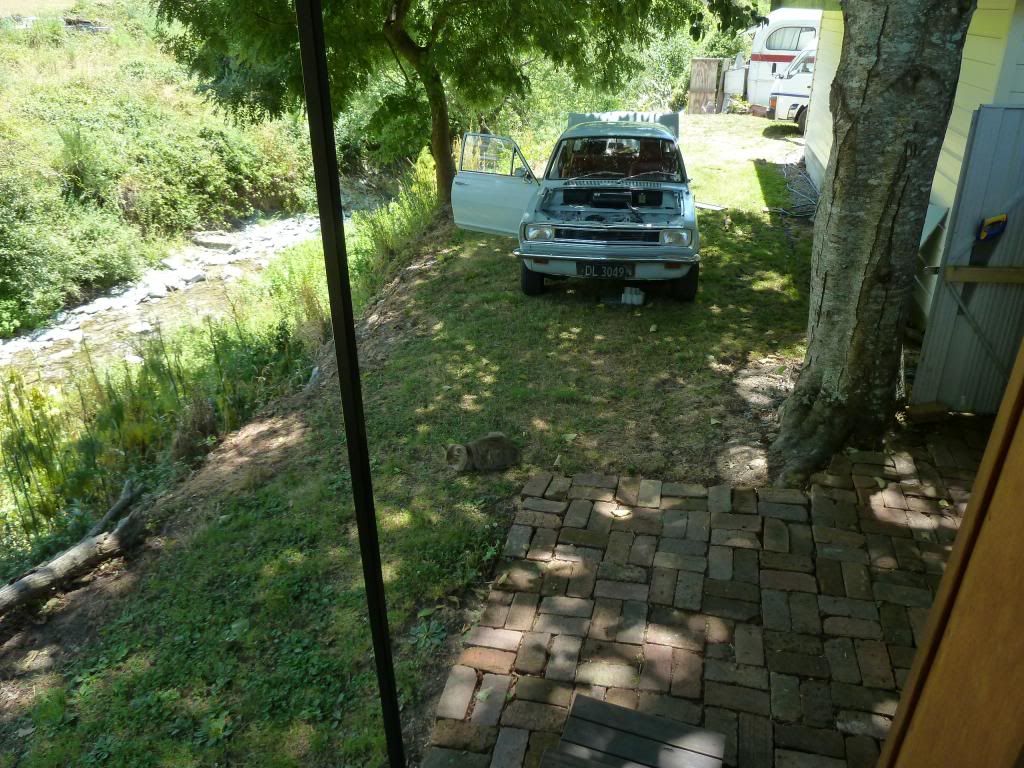
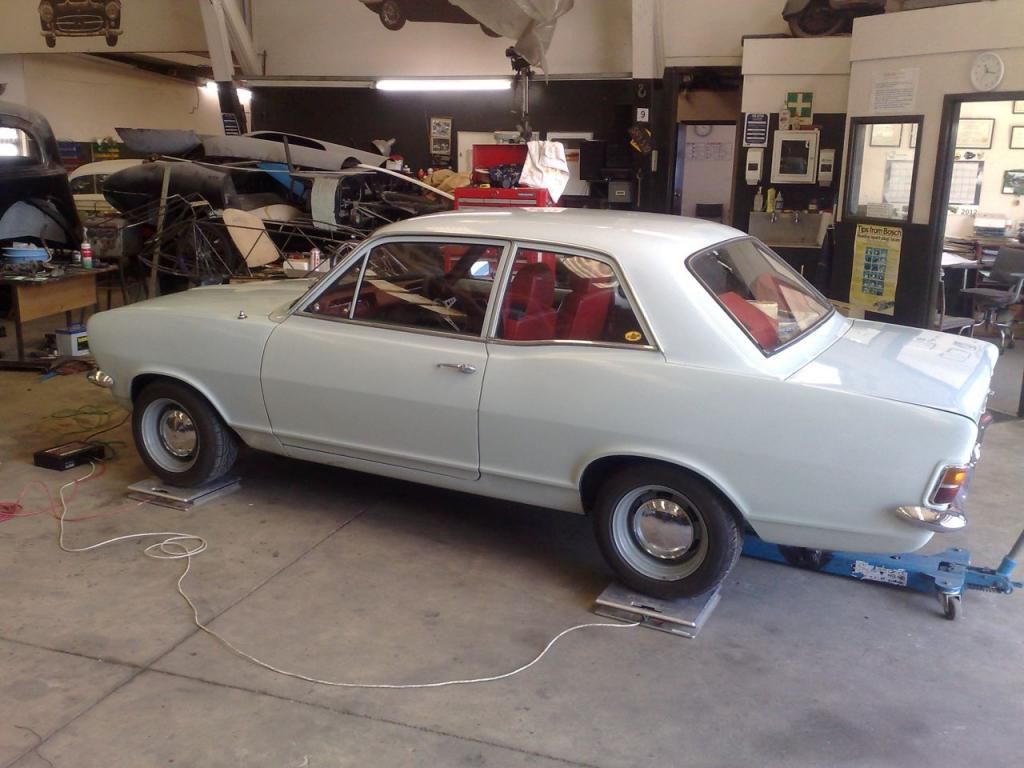
Today the Viva goes under the knife.

And its out...

Image

Then in with this.. except I had only loosely done the clutch cover bolts so the input shaft moved the disc so they wouldn't mate up, it was bloody hot, properly bloody sweating wet through hot with a beach only 3 mins drive away and we were running late to look after the olds dogs for xmas. But anyway- it fits without touching the servo- so thats nice.

Image

Oh and looking after the new maine coon girl called Molly- who has the biggest tail I have ever seen on a cat..

Image

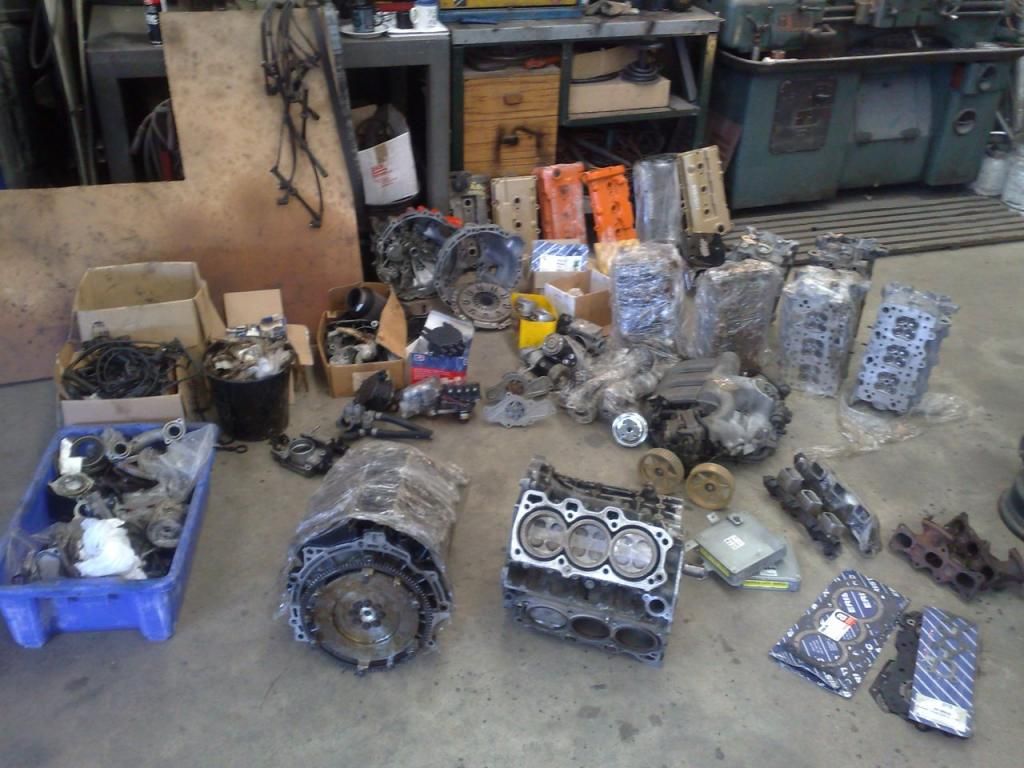
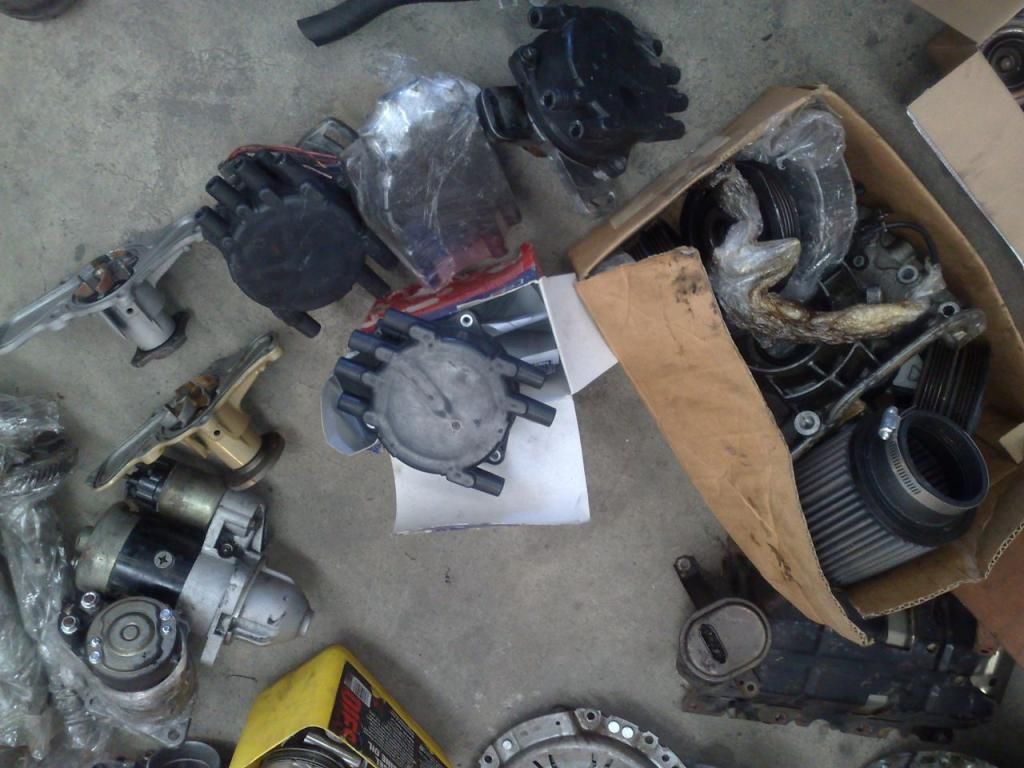
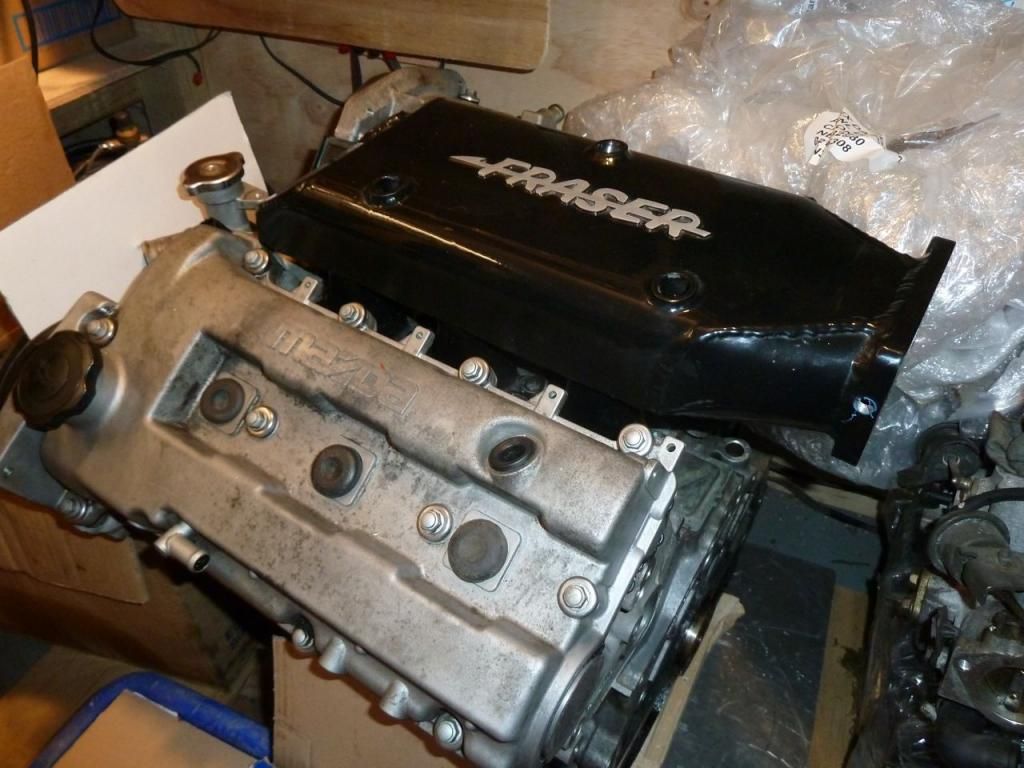
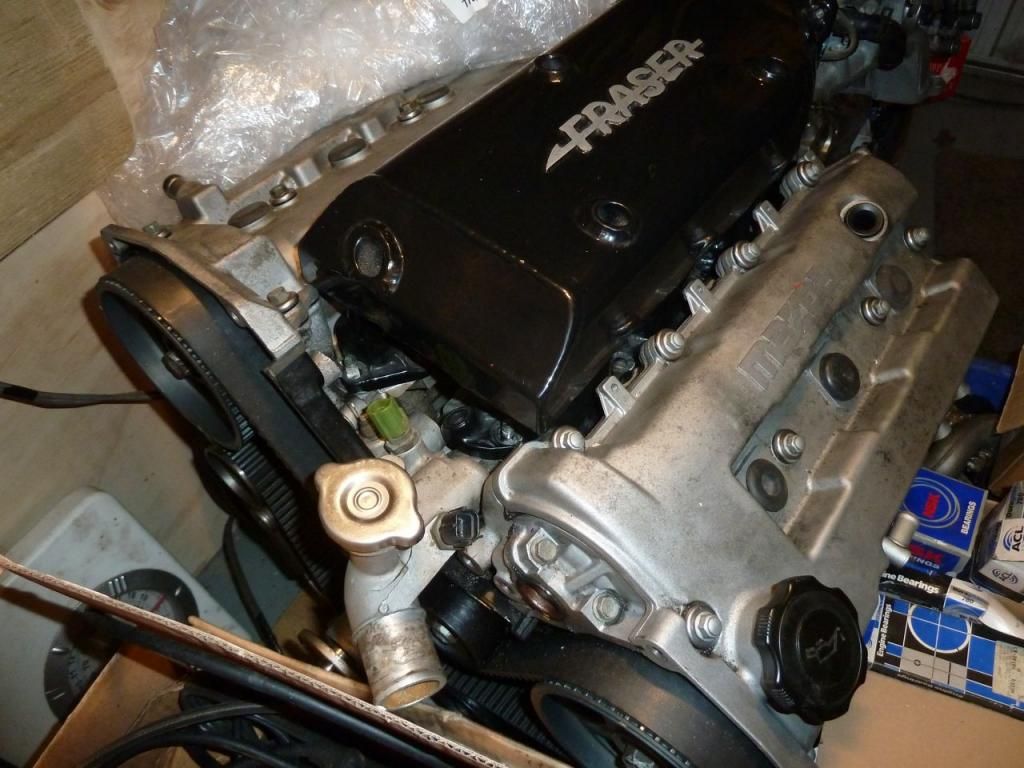
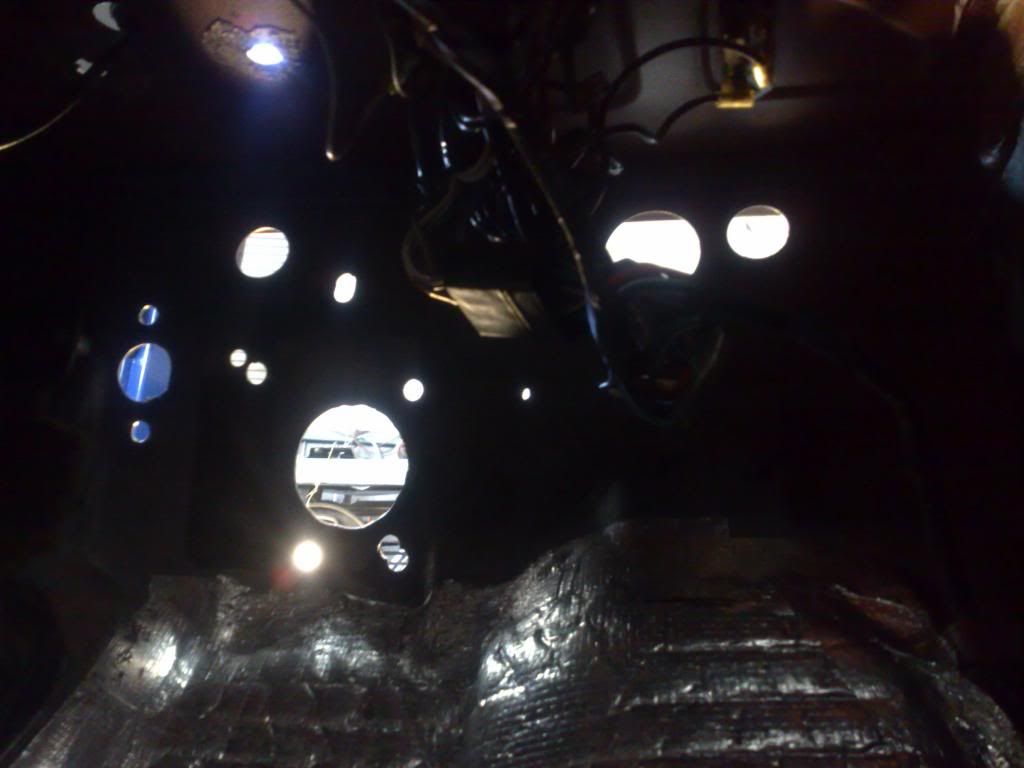
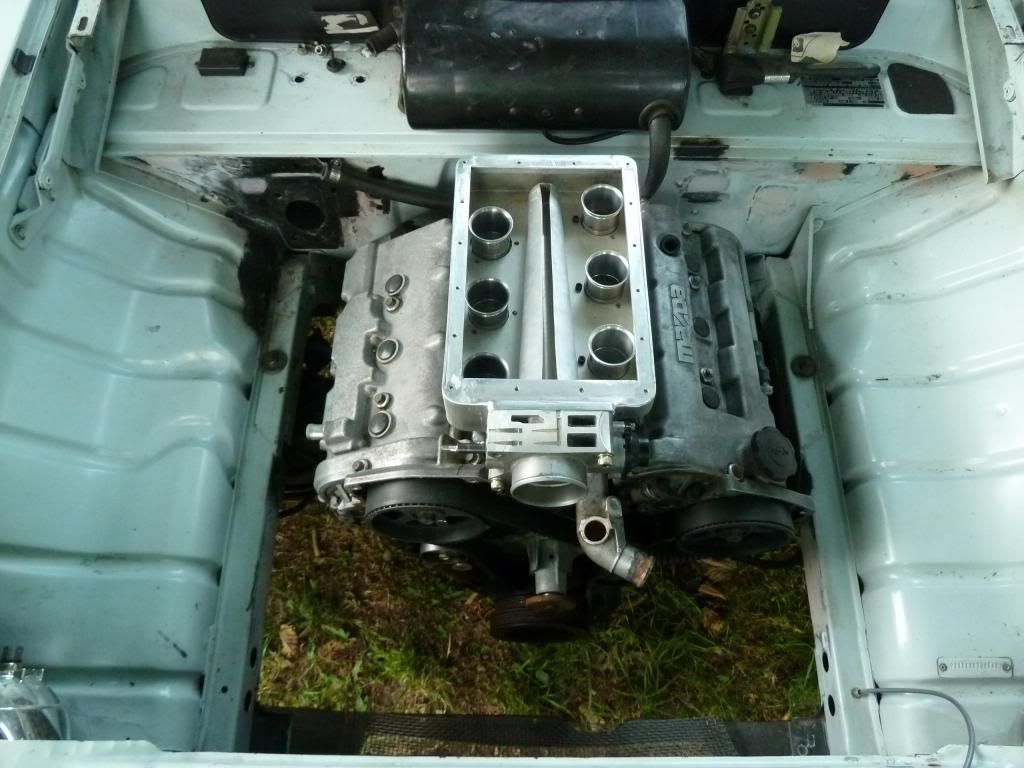
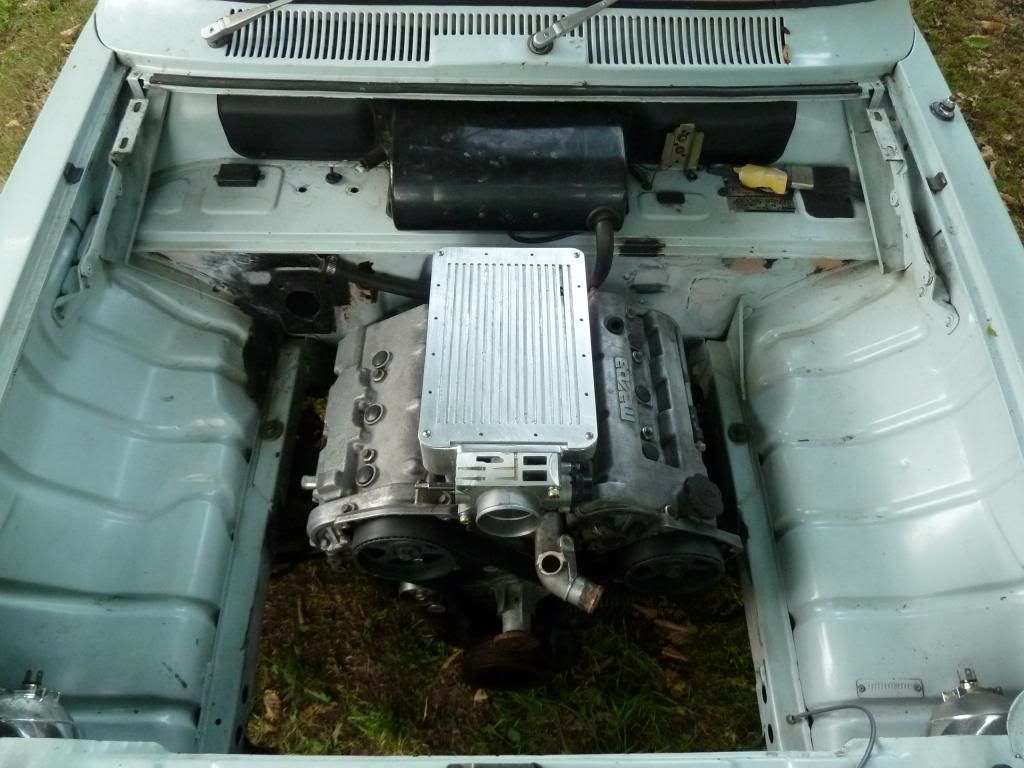
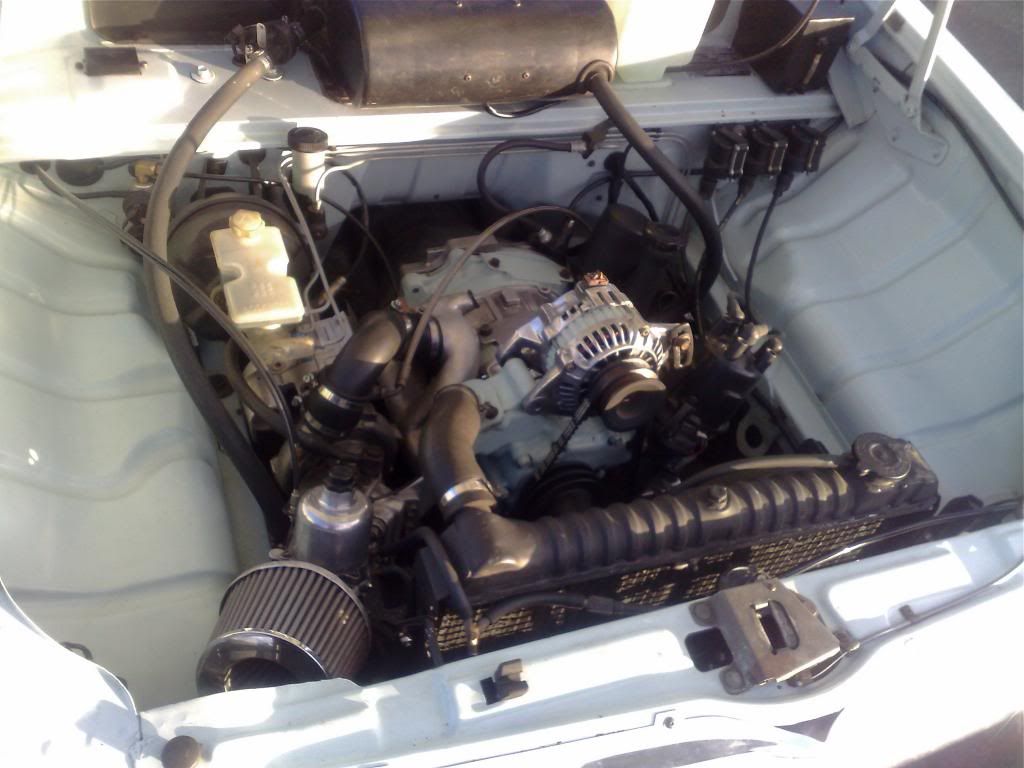
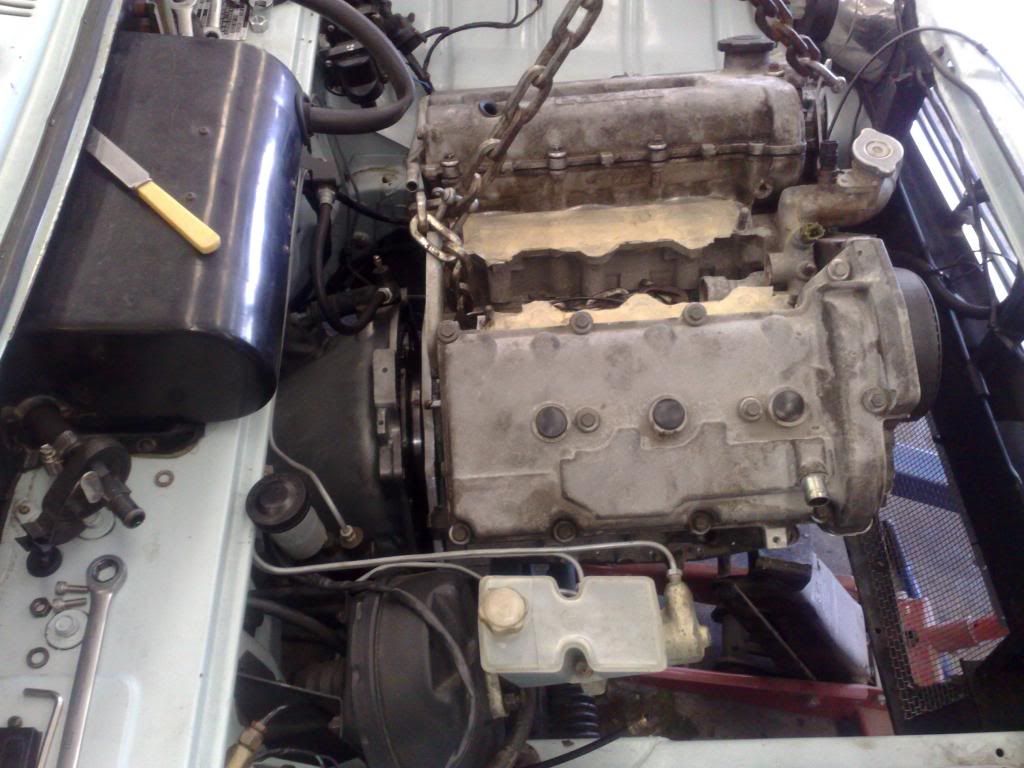
The Mazda V6 engine is now sitting happily in the bay. Looks good but is now involving a fair bit more work than I first thought.. I knew it!!! Typical. But its all for the greater good.

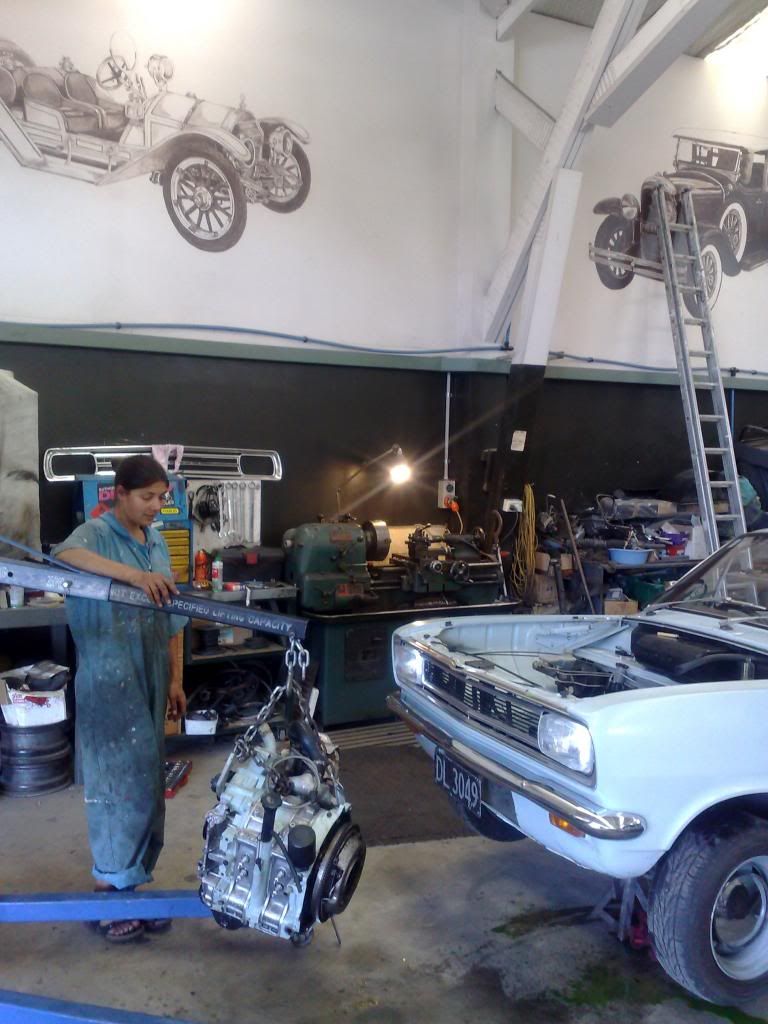
Started off this morning by making a proper engine hoist hanger bracket thingee that is adjustable front to back so I can tilt engine. Now much better than silly chain we tried using 3 days ago. With the new EHHBT the engine slid into place with a nice 'thunk' over the input shaft.

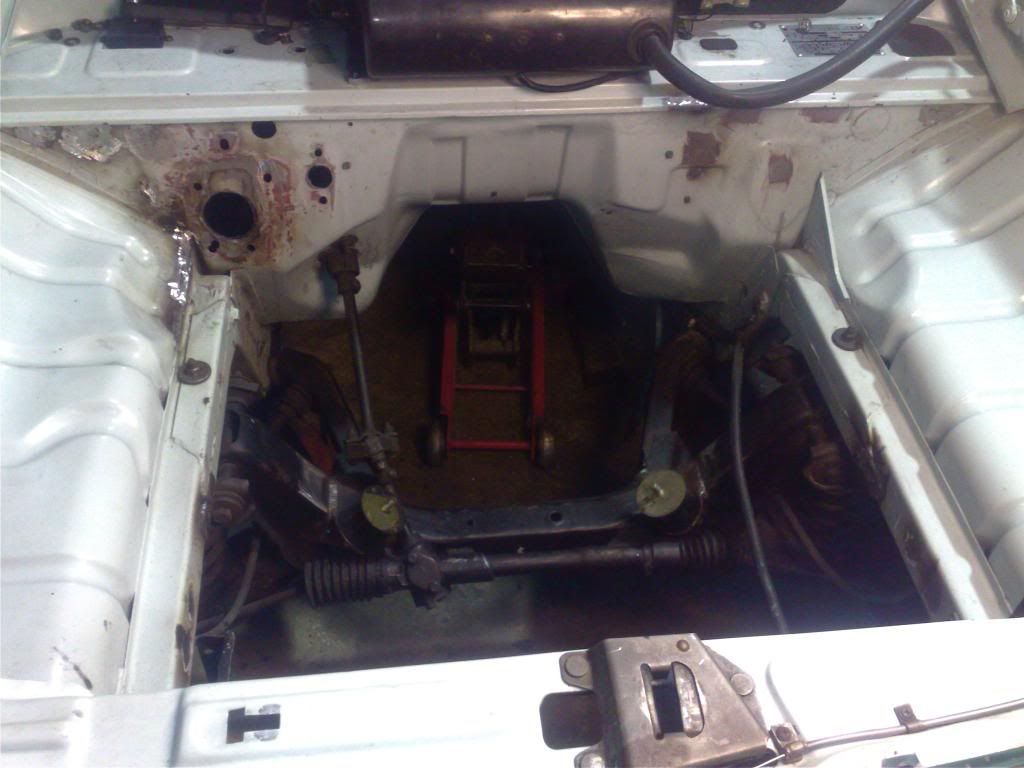
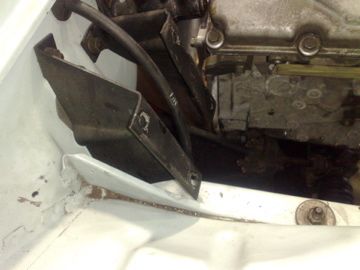
This is where I started head scratching. The engine sits lower than thought because the rotary was mounted a bit higher due to its sump. With the engine lower it also seems a bit further forwards than I thought it would be. Plus, due to the g/box bracket being situated about one third along from the rear of box, the box end has gone up as the engine front went down. hmmm- now the prop shaft sits a touch too high.

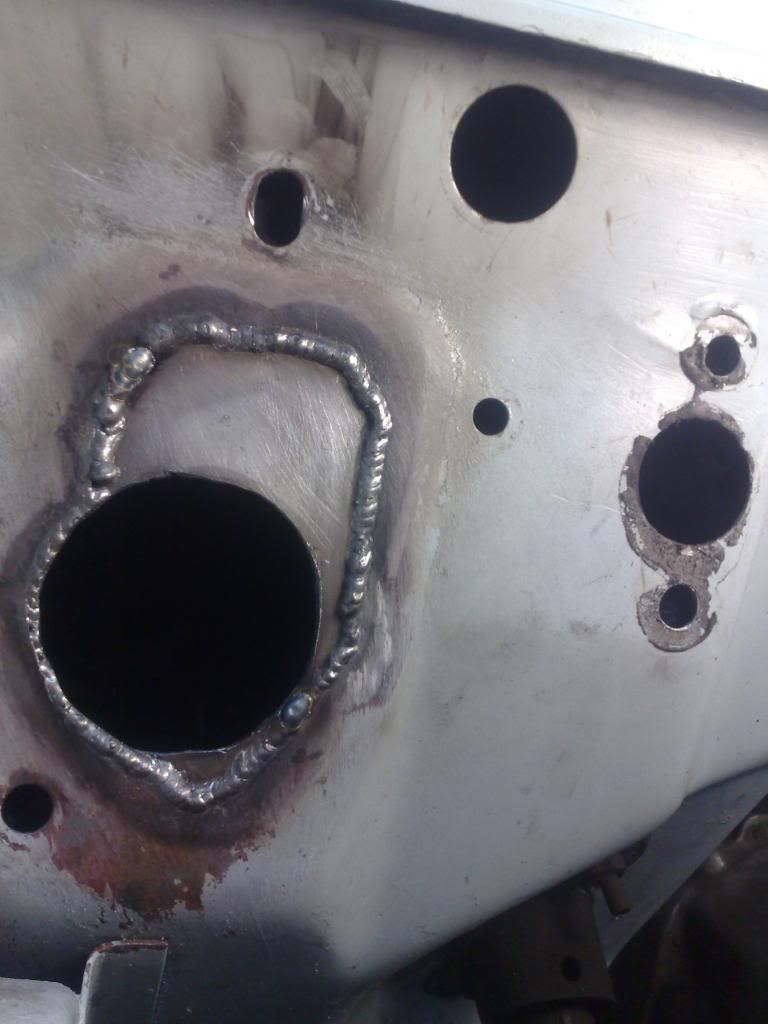
Hannah and I stood there looking at the vast space between the heads and the bulkhead. My only main reason for not planning on moving the engine further back was because the propshaft would need shortening, the gear lever might end up too far back, the Lh head would hit the servo. But it was just bugging us- all that space. So we set to work before I changed my mind and while Hannah removed the gearstick, carpets and gearbox crossmember I removed the exhaust and propshaft. Then I chopped a big hole out of the tunnel with mr plasma..

Image

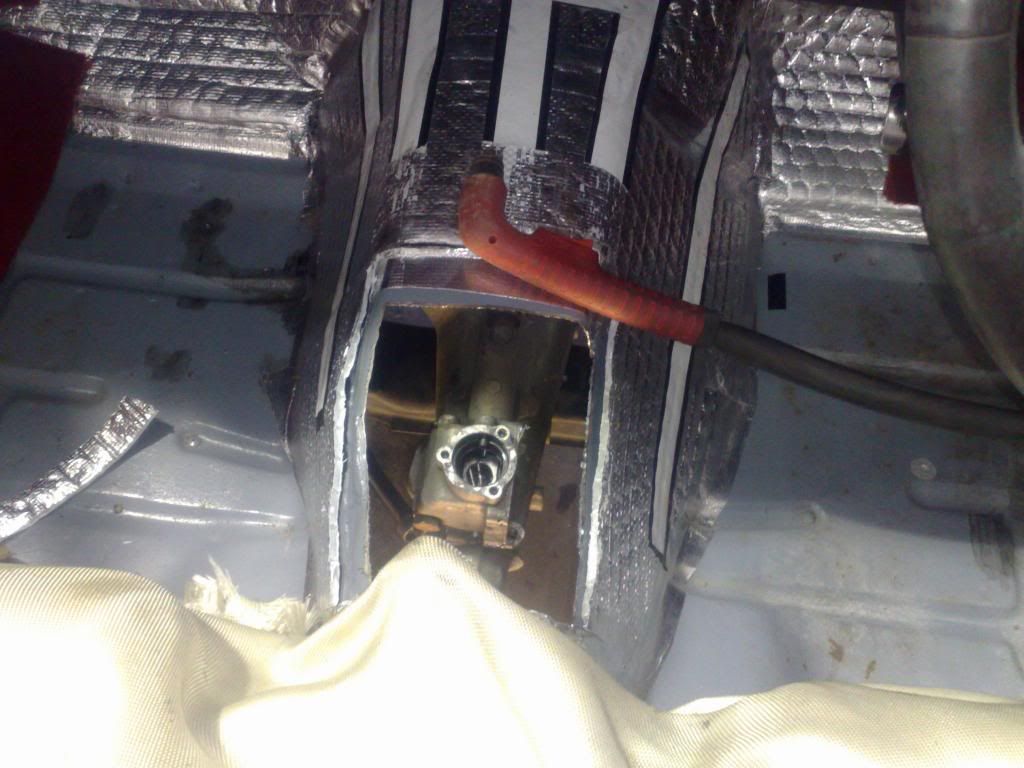
..then we pushed the engine back 60mm.

Ahhhh- much better!

Image

Image

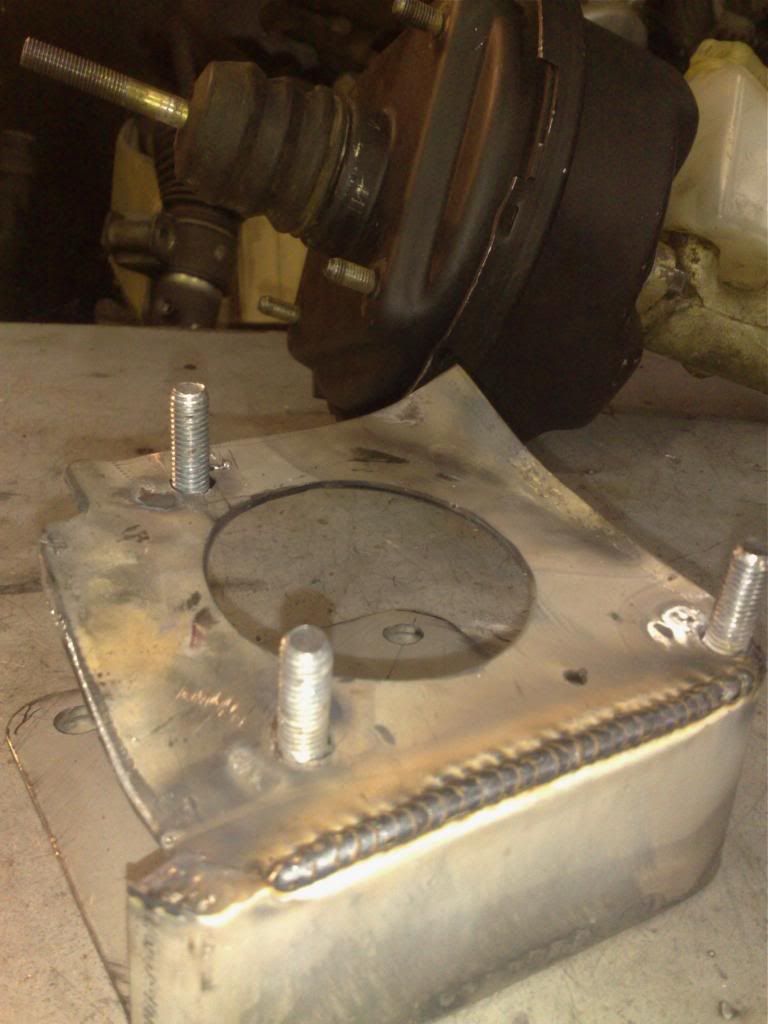
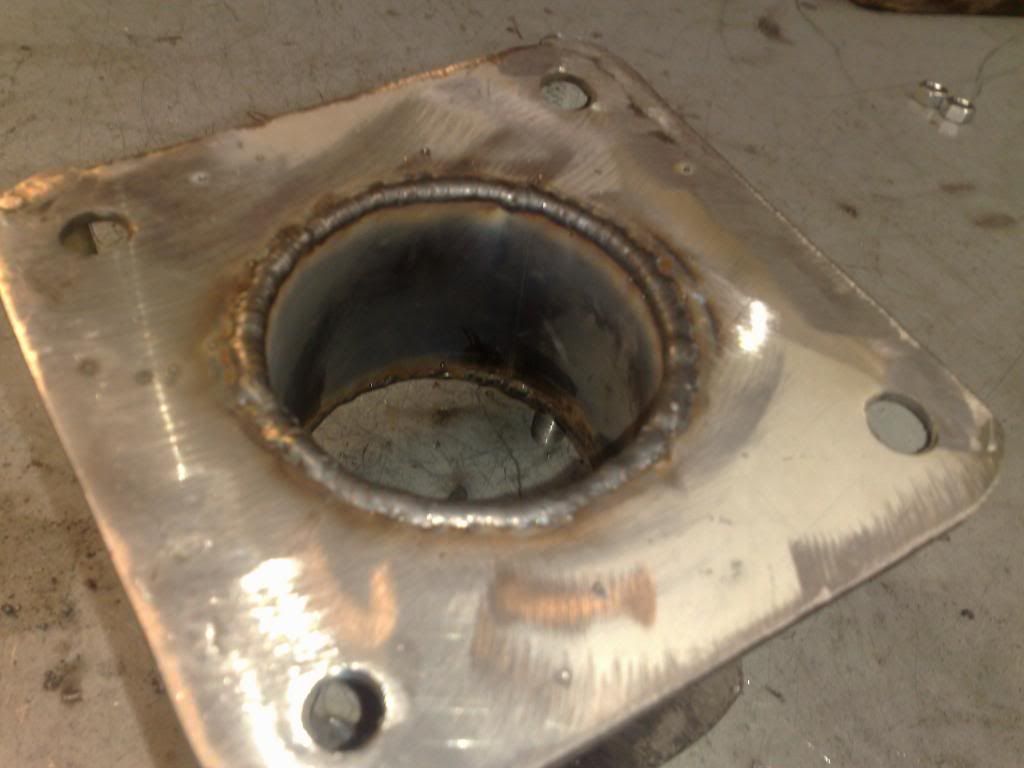
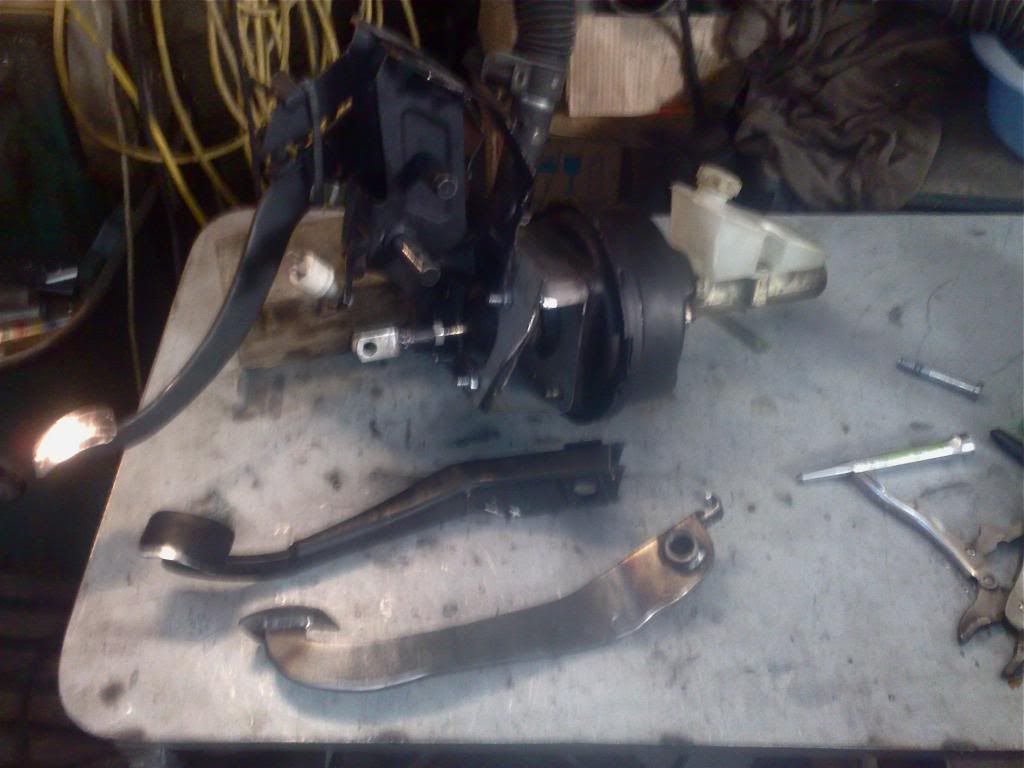
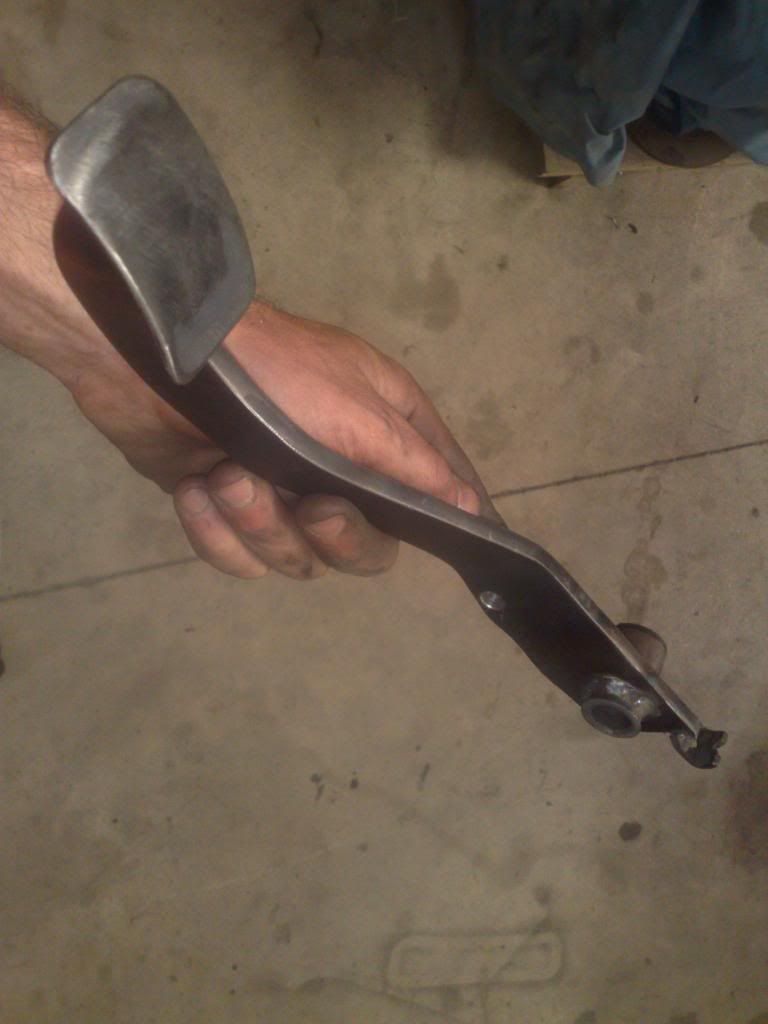
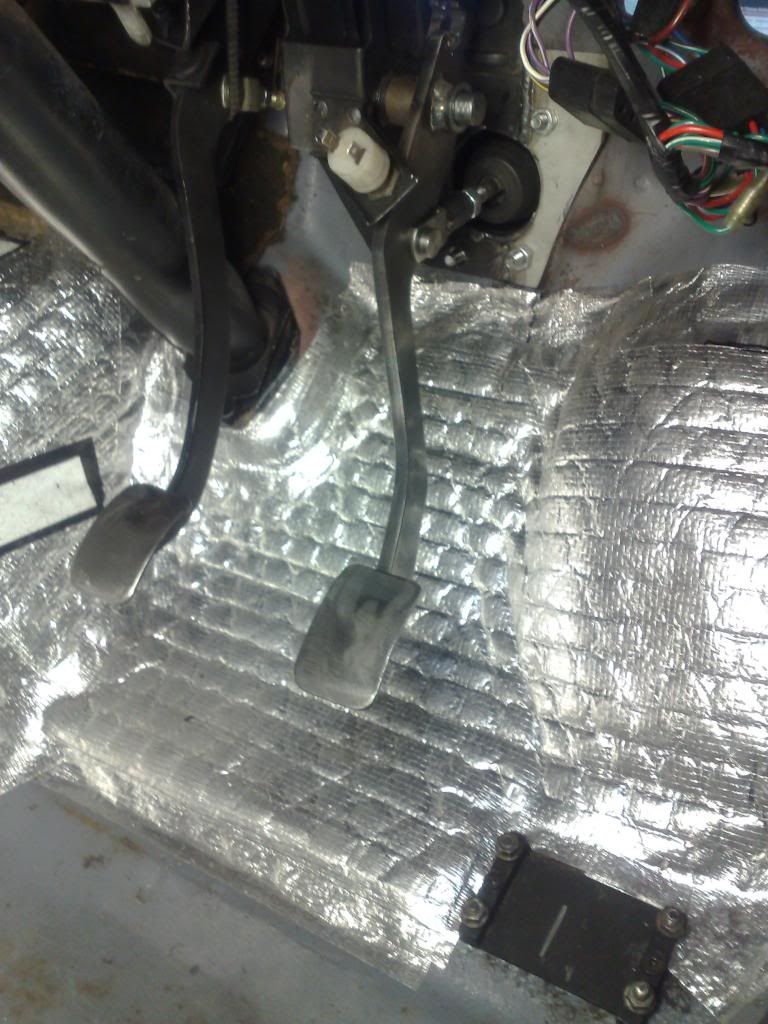
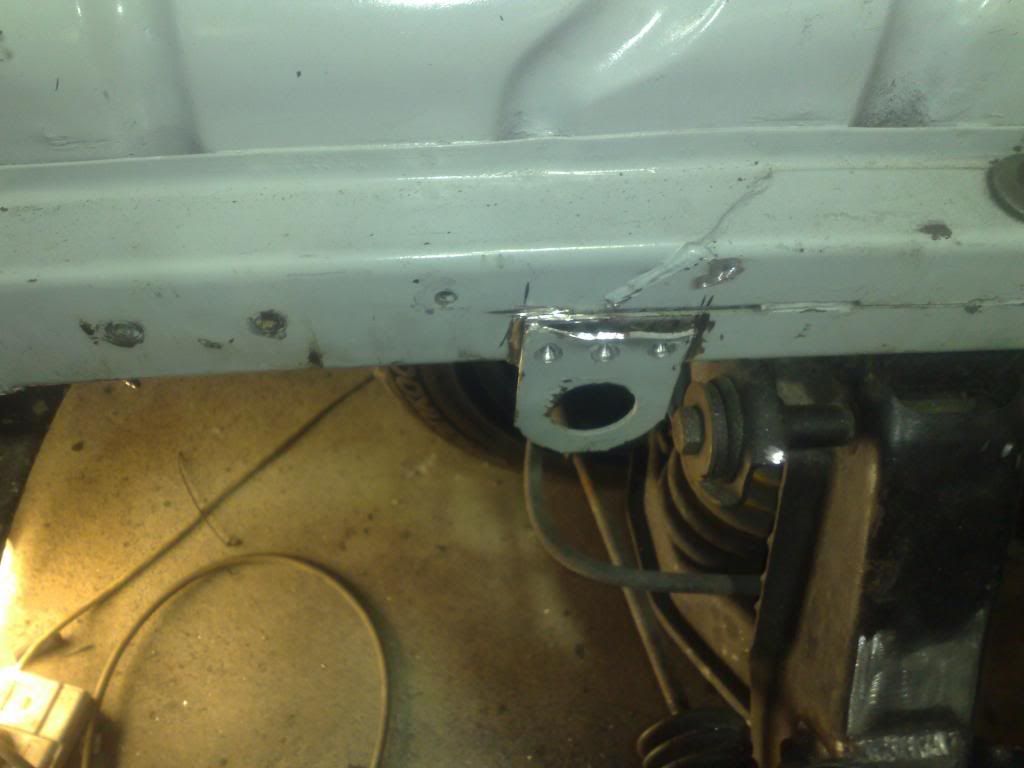
I will have to move the servo to the left by about 25mm and to do this neatly I will make a new pedal box layout, chop a silly little bracket away from the bulkhead, strengthening it else where with seam welds and move the servo closer to the bulkhead while I'm at it- to make it tidier a looking area.

Image

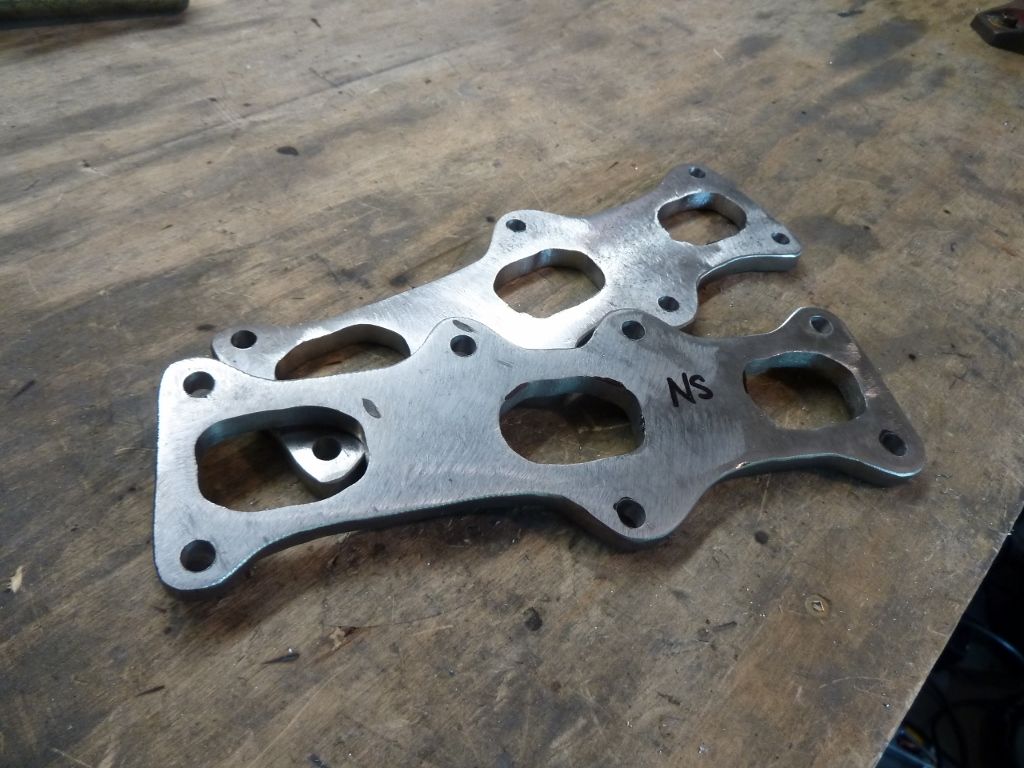
I need to make a new brake pedal anyway as the new certifier I'll be using will spot what the last one didn't even look at- the fact that my current brake pedal is made up of two pedals, rx7 and viva, welded together. Welding these parts is apparently a big no no.

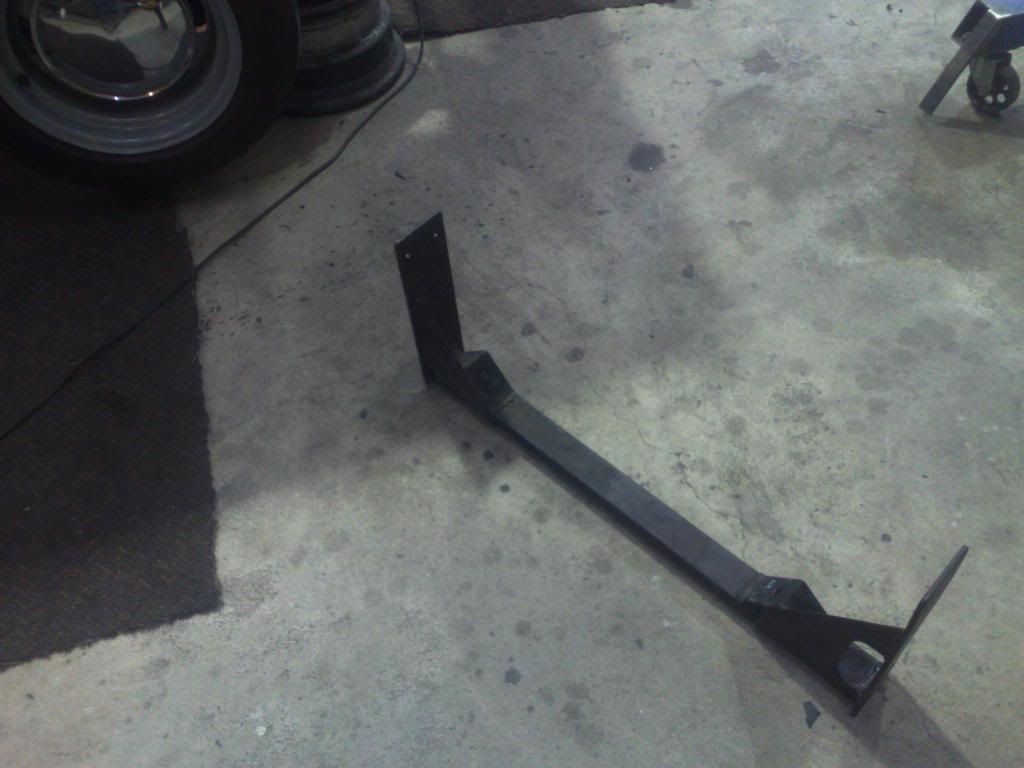
So there we have it- now a fair bit more work involved than I had initially planned but that doesn't matter as the engine is now in a better position and so far its still actually falling into place in OK manner- for example..the new gearbox position 60mm further back meant possibly a new crossmember. But I noticed that the crossmember is not straight across and actually has the box mount forwards. So we flipped it around 180 degrees and the box mount still sits right in the middle. And the new gearlever position falls to hand even better now.

Image

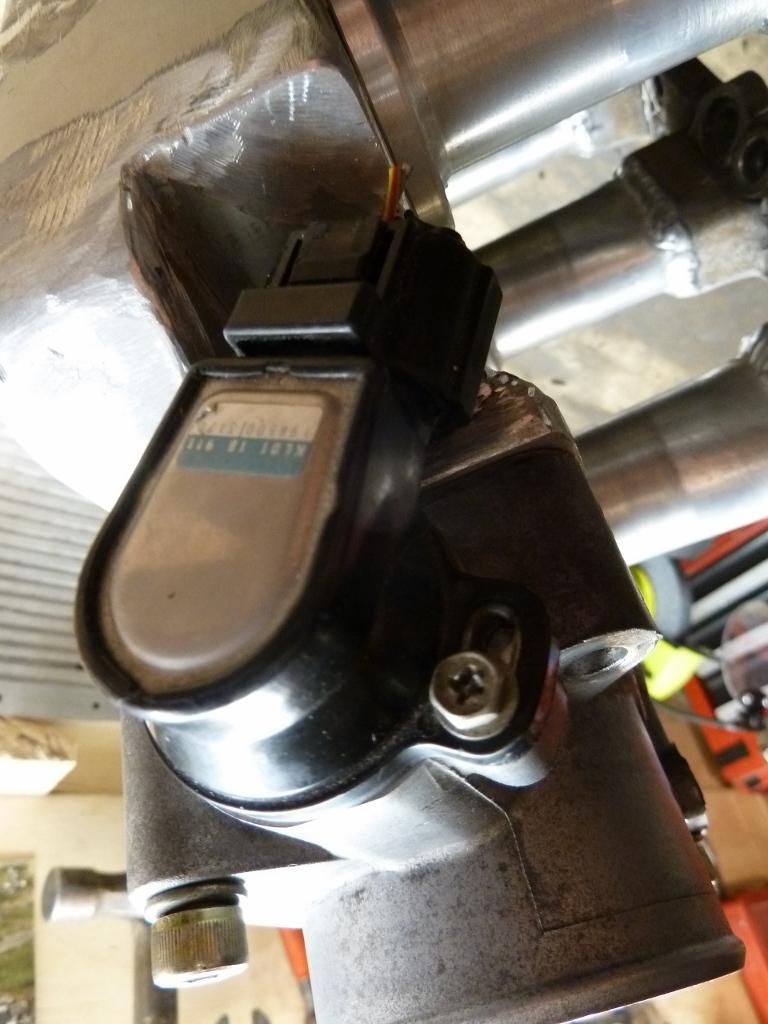
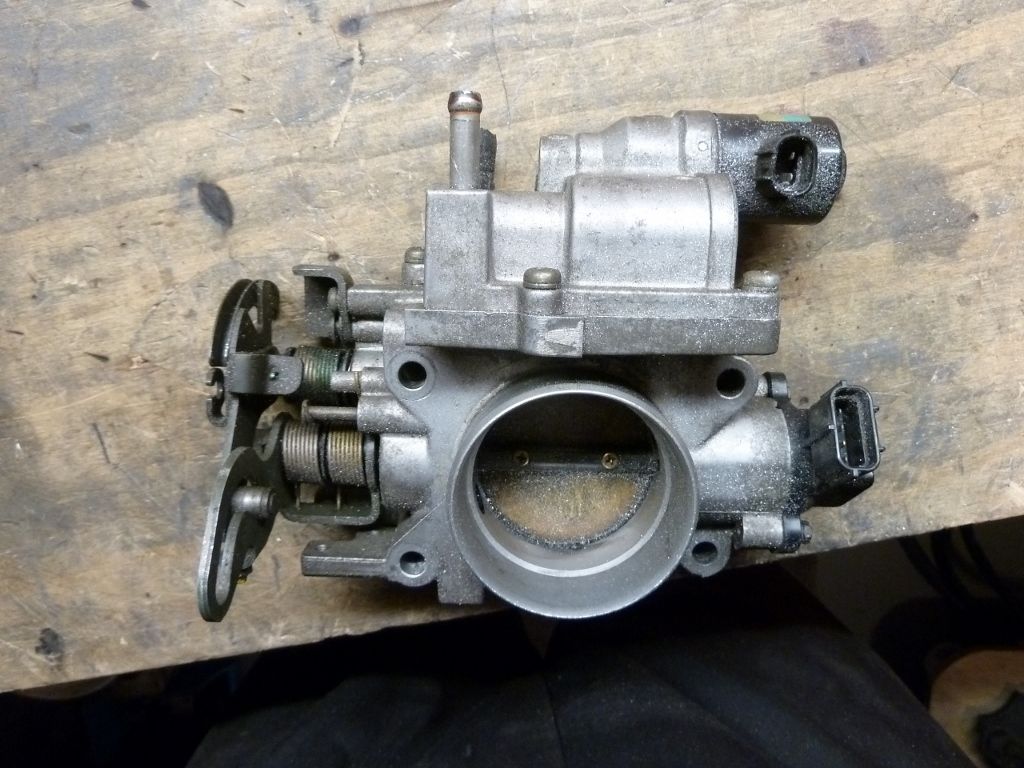
The oil filter has a little cooler thing mounted above it. Now the filter sits right over the rack and cant be easily removed. But I was thinking of removing the little cooler thing- its so small I cant imagine it does much? Does it? I think its more of an oil warmer for cold climates and quick warmups maybe? anyway- i'll have more oil capacity with my planned sump mods so maybe that will offset the warmer oil?
yoeddynz
Brabham Viva
Brabham Viva
 
Posts: 707
Joined: Fri Oct 12, 2007 2:47 pm
Location: South Island, New Zealand

Re: hB with Mazda rotary turbo. 24V V6 next.....

Postby pbottomley » Thu Dec 27, 2012 11:56 am

Interesting fit Alex.. always been fearful of those massive Vauxhall Omega V6's this one looks a lot tighter in terms of design, so should give you the space required.... Hows the sump side of things or have we not gone there yet ? :D
User avatar
pbottomley
 

Re: hB with Mazda rotary turbo. 24V V6 next.....

Postby yoeddynz » Thu Dec 27, 2012 7:01 pm

Yeah it's a very compact and lightweight little engine. Sump will be easy. For starters it's steel and front bowl. I'm planning to just cut off the flange with 1" of sidewall in place and then build a new sump to suit. Easier now I'm working at this place as we have a decent sheet metal folder. :)
yoeddynz
Brabham Viva
Brabham Viva
 
Posts: 707
Joined: Fri Oct 12, 2007 2:47 pm
Location: South Island, New Zealand

Re: hB with Mazda rotary turbo. 24V V6 next.....

Postby yoeddynz » Sun Jan 06, 2013 11:25 am

I have a few photos to pop up starting with this one....

Image

Yep. My Viva is now back home. I now have no excuse, except mtbing, running, swimming, drinking rum in the sun..to not crack on and tinker away at it whenever I am home.
As you may have spotted- Timmy the cat is standing guard. He's gonna get lots of cuddles now I'll be about working on the car and be a right proper time waster I think.
Its a good spot. I don't know why I have never bothered to park it around here before. Close to the shed, the truck, the creek, hot and sunny in the afternoon through to sunset. Plus I now have my big old hifi setup to crank up.

So before it moved I spent the last week going to work off and on in between the above activities and chipped away at the trickier fabrication jobs where workshop equipment is handy. I continued on with the sump and lengthened the sides down following the original shape for easy access to the bolts...

Image

Image

I had a go at tig welding it. First proper go at tigging steel..

Image

Its not the tidiest welding thats for sure but as long as it doesn't leak I guess its fine. The weld penetration is good and its great practice. I only had one 1.6mm steel filler rod and the suppliers were all shut over xmas break. I want to wing it and have as much capacity without it sticking down to far. I have some rods now so its first job for tomorrow. I love not working mondays!

Another job I completed was the relocation of the brake servo/booster. It needed to be shifted 20mm out and also in closer to the bulkhead.
First off was to fill the old hole and re-centre a new one..

Image

I ditched the puny pressed steel brackets and made this from 2mm sheet...

Image

It had to be shaped to suit the now 'not so flat' position on bulkhead. I then added a forth bolt once it sat flush.

Strengthened it as well as sealing it to stop engine smells, drafts with some stainless exhaust tube laying about.

Image

The current brake pedal would not have cut the mustard with mr Cert man. You are not allowed to cut and shut, weld etc the brake pedal arm. You can play about with the foot pad end but the main arm must be one piece. So I built a new one which allowed me to also change the location. I wanted it to be beefy and stiff. I found some 8mm thick angle iron and plasma cut out the general shape, ground it neat, bent it with gas set, added a new foot pad and machined a new pivot sleeve to take the old bushes. I moved the pick up point for the servo rod down 10mm as the travel was always too much and felt squishy even after lots of bleeding. I may later on play with other positions and or master cylinder bore sizes but I think it should be good now.

Image

Image

Its super tough and almost looks factory so im happy with the result. Hopefully Certman will like it....

Image

The old gearbox tunnel top with the gearstick gator turret was getting pretty tired after now having been hacked at and moved for 3 different engines. Time to make a new one. Again a nice job to do at work over a xmas break, with no one about and MY music being played at number 11. Plus having tools like this available to use make things fun and easy..

Image

I welded it in slowly, stopping often to make sure nothing was on fire. The new turret position in action...

Image

After having finished that it was off to the beach for a freshen up. 30 degrees outside and not a cloud in the sky makes being in a big tin workshop not a nice place. The beach is only couple of minutes away. ahhhh.

Finished off last jobs when back from beach. I wanted to get rid of all the extra holes in the bulkhead...

Image

I'll make new ones to suit the new loom etc. So we pulled the engine out- this time with the box attached which was easy as. I welded little discs in place while Hannah sat inside the car wearing leather gloves and extinguishing all the fires catching in that old car horse hair like insulating matting thats fitted on the bulkhead.

Image

While I was standing in the bay I cut off the very ugly ferry tie down hooks. If its ever rough sailing when it goes on a ferry they cansling it through the crossmember or something. Looks much cleaner without them there and thats the look want.

Image

For now the bulkhead will sit with primer till I have finished all the plumbing, wiring, hacking. Then I'll pull the lot out and get Shane, the painter at work to paint the bay in a really smooth, lush, hardwearing coat of 2 pack. In original colour. I want it to be super easy to clean unlike my current orange peely rattle can job.

While shifting stuff about I moved the old rotary engine crossmember and realised its another big chunk of weight I was losing from the bay- all helping to even the weights out.

Image

Better get some sleep and be fresh for a day of vivaring.

Image
yoeddynz
Brabham Viva
Brabham Viva
 
Posts: 707
Joined: Fri Oct 12, 2007 2:47 pm
Location: South Island, New Zealand

Re: hB with Mazda rotary turbo. 24V V6 next.....

Postby hbpeter » Sun Jan 06, 2013 2:26 pm

Speechless! You make it all sound so easy its a wonder we all arnt doing similar things!!

Peter :respekt:
Reading between the lines, dangerous if your waiting for a train.
User avatar
hbpeter
Register Rep
 
Posts: 10918
Joined: Sat Oct 29, 2005 12:11 pm
Location: Thornaby, Cleveland

Re: hB with Mazda rotary turbo. 24V V6 next.....

Postby yoeddynz » Sun Jan 06, 2013 7:38 pm

it is easy but takes time. :) But yeah- I think it fits in there so nicely and so far it looks like its going to be every bit as light as the rotary. I love the way Vivas have such accommodating engine bays. :D these engines are very cheap. Biggest hurdle is making a adaptor plate to suit but its not hard. Plus machine the V6 starter down to suit in a lathe.

I think where Im gonna start head scratching will be the ecu as that is all new to me. But looking forwards to learning about it all.
yoeddynz
Brabham Viva
Brabham Viva
 
Posts: 707
Joined: Fri Oct 12, 2007 2:47 pm
Location: South Island, New Zealand

Re: hB with Mazda rotary turbo. 24V V6 next.....

Postby bobblehead006 » Sun Jan 06, 2013 11:30 pm

Looking mint!!! :respekt:
User avatar
bobblehead006
SL Viva
SL Viva
 
Posts: 77
Joined: Sun Mar 25, 2012 11:14 pm
Location: manchester uk

Re: hB with Mazda rotary turbo. 24V V6 next.....

Postby yoeddynz » Wed Jan 09, 2013 7:20 pm

Cheers :)
yoeddynz
Brabham Viva
Brabham Viva
 
Posts: 707
Joined: Fri Oct 12, 2007 2:47 pm
Location: South Island, New Zealand

Re: hB with Mazda rotary turbo. 24V V6 next.....

Postby yoeddynz » Wed Feb 06, 2013 11:27 am

Photo dump time as its been a while since last update. I just spent f--king ages typing out my latest update
and then accidenty pressed the x of doom and lost the lot.
so now a short version..
Inlet manifold- i wanted to do somethimng in a 80s factory rally sort of look. The fraser manifld runners are too short
and put the tb in wrong place plus i wanted to build my own. I did lots of thinking about designs, lots of drawings etc
and read lots of stuff on nerd net. I found out about the dual plenum designs used by audi for many years;

http://www.bufkinengineering.com/intake%20manifolds.htm

I liked the idea but the tapered tube would have lost me vauable space. So I thought inside the box...

Image

Image

I made room for the new Tps position..

Image

I then milled up a lid with the old mill at work. Its exactly the look I have planned since
first picturing a V6 in the viva. Sadly the mill doesn't have a proper collet type holder and the 5mm slot drill I had used slipped down in the chuck and went right through on the second groove I cut. I'll weld it up from behind. You can see where it went through on the top right...

Image

Image

The stock mazda TB is a horrible huge peice of work...

Image

I duly removed this lot with the saw..

Image

Ended up with this..

Image

I'll weld up the remaining holes and mill it flat.

This afternoon I gas cut some exhaust flanges out and Hannah had the fun job of covering herslef in
small shards of metal used the die grinder to clean up the holes.

Image

I'll order some exhaust bends tomorrow.

We started on the Megasquirt build. And i mean we as Hannah has been reading up the fuel injection book I bought from amazon and is pretty into it. Handy as she spotted quite a few simple things I almost mucked up when assembling it. its quite fun building it- I think the setup and tuning will be more of a drama. Note how my sideburns have gone grey from having to deal with the ownership of one small cat. I totally understand the stress parents must have...

Image

I have installed the new radiator. I actually managed a pretty neat (for me) set of welds when adding some brackets. Its shame they wont be seen. Happy with the radiator and the way it fits in. but its too shiny and will end up being painted black I think. I dont have a photo of the radiator in place but heres the weld i like..

Image

and heres Timmy hard at work helping me...

Image

I broke out the little old mig for some hole filling. I filled in the old air feed hole for the SU carb and made a new larger hole to feed the pod filter on the other side..

Image

Image

Image

Next big job to get out of the way is to build the new exhaust.
yoeddynz
Brabham Viva
Brabham Viva
 
Posts: 707
Joined: Fri Oct 12, 2007 2:47 pm
Location: South Island, New Zealand

PreviousNext

Return to Modifications

Who is online

Users browsing this forum: No registered users and 5 guests

cron